In Dispatch
Overview
Dispatch contains all of the requests submitted by your
end users (via email or the web portal) and acts as a container for the issues
submitted to your support desk.
From this area, the Dispatcher(s) will review a
request. Here, a dispatcher should ensure that sufficient information is
available to assign the request to a queue or support rep as well as assign the
priority of the request. It is also possible to automatically dispatch
requests via the HelpSTAR Business
Rules.
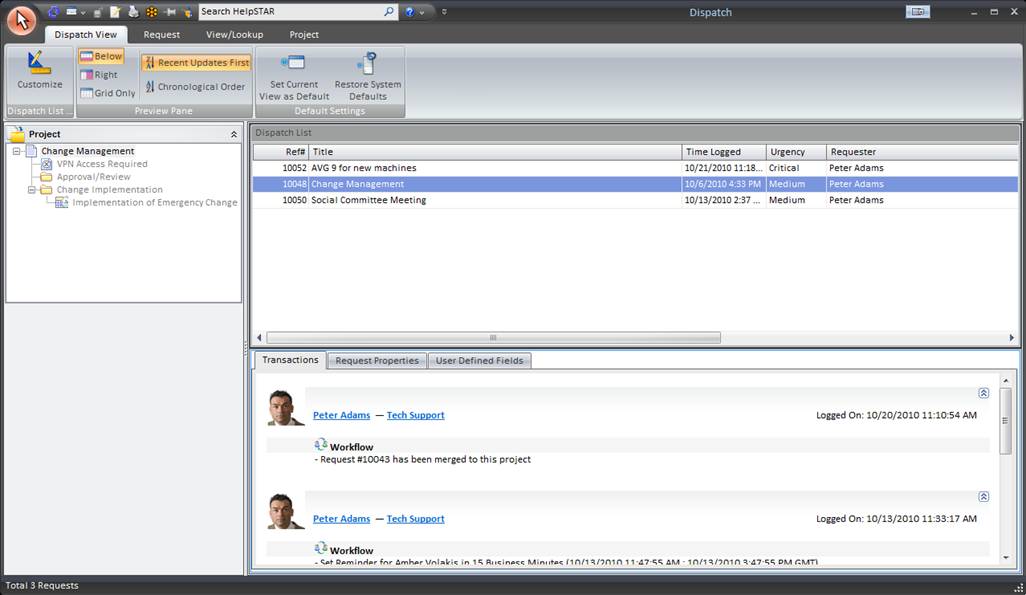
1. Ribbon Toolbar:
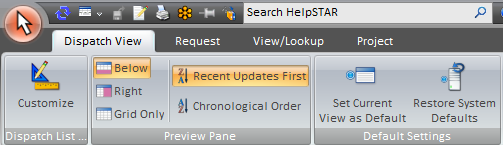
The Dispatch view toolbar will present several tabs with
varying options to address requests in Dispatch.
Dispatch View
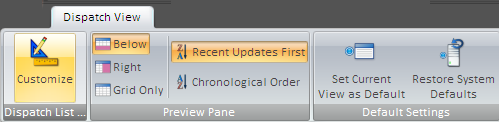
Dispatch List

- Customize: Users of the HelpSTAR Windows interface can
customize the grid in any of their request listings by clicking the
"Customize” button. For each specific listing, a user can select which rows
(fields) will be displayed in the grid. Also, they can display them in a
different order, edit the captions or filter the field criteria, etc.
Preview Pane
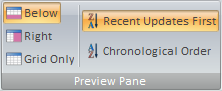
This section allows you to specify how the In Dispatch Request List (grid)
and the Alerts Detail should appear.
- Below: View the Dispatch Detail below the Dispatch
List.
- Right: View the Dispatch Detail in a panel to the
right-hand side of the Dispatch List.
- Grid Only: View only the Dispatch List grid.
- Recent Updates First: View most recent updates of the
request in the preview pane.
- Chronological Order: View updates to a request in the
order in which they were inserted.
Default Settings
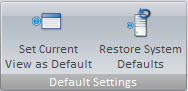
- Set Current View as Default: Make a customized view
the default view for the Dispatch window.
- Restore System Defaults: Set the default view to the
original system view.
Request Tab

The request tab allows you to insert memos and make modifications to a
service request in Dispatch without entering update mode.
Insert
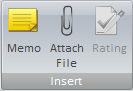
- Memo: Insert a memo into a request.
- Attach File: Add an attachment.
- Rating: Provide an Approval Rating for this request.
This option is only available when a closed request is selected.
Change Property
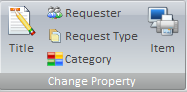
- Title: Modify the title of a request.
- Requester: Change the user requesting support.
- Request Type: Select a different request type if other
types have been created using User Defined Fields.
- Category: Modify the category of this request.
- Item: Select an asset that this request has been
logged about.
Move To
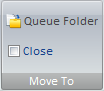
- My Service: Move this request to your In Service folder.
- Another Rep’s Service: Move this request to another
Support Rep’s In
Service Folder.
- Dispatch: Moves this request to in Dispatch.
- Close: Close the request in view.
Schedule
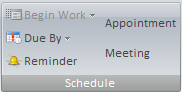
- Begin Work: Specify when this request should be
addressed.
- Due By: Set a different Due Date for this request.
- Reminder: Set a Reminder for a future date or time.
Set Importance
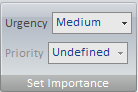
- Urgency: View the urgency of a request as set by the
requester.
- Priority: Set the internal priority of this request.
Edit Memo

- Edit Memo: Edit text, time code information or time
worked for existing memos in this request.
Automatic Email Update
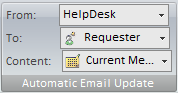
- Updates: Turn email updates on or off for this
request.
- To: Select the recipients of the email update.
- Content: Specify whether to send the request history
or the current memo of the request.
For more information please see Automatic Email Updates.
Communication
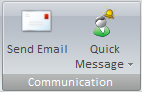
- Send Email: Send an email from the request.
- Quick Message: Send a message as part of a thread from
the request.
Recurrence

- Recurrence: Set a specified date/time or interval for
this request to be created. Recurrence can be used for scheduled tasks
or events that occur on a regular basis.
Lookup Tab
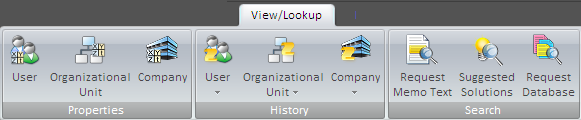
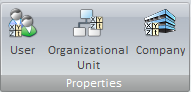
Properties
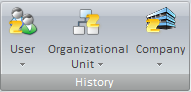
History
Search
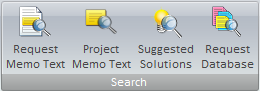
- Request Memo Text: Look for specific text within a
request.
- Project Memo Text: Look for specific text within the
project that this request belongs to. Note that this option will only
appear if the request selected is part of a project.
- Suggested Solutions: Look in your Knowledge Base for
Best Solutions for this request. See Knowledge Management
for more information.
- Request Database: Look for a specific request using
our Advanced Search functionality.
Project Tab
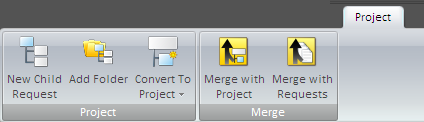
This tab will appear if the highlighted request in Dispatch is a member of a
project.
Project
- New Child Request: Add a child request to the selected
request in view.
- Add Folder: Add a folder to organize a group of
requests.
- Convert To Project: Convert the selected request using
a previously defined Project
Template. Note that this button will only appear if the request does not
have a parent request or is a child request of a project.
- Merge with Request/Project: Merge the current request
with a project.
- Remove From Project: Remove the selected request for
an existing project. Note that this option will only appear if the
request selected is part of a project.
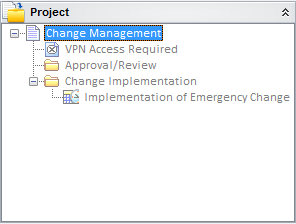
2. Project Pane
If the selected request in the request listing is a member of a project, this
project preview pane will appear. Here you can view the project that a
request is a part of.
3. Dispatch List
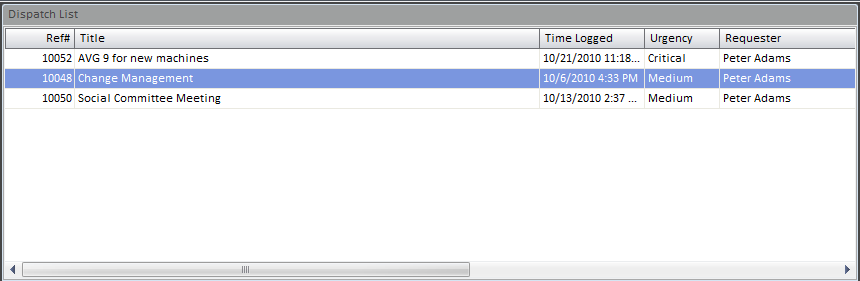
This section allows you to view all requests that are currently in dispatch
and are waiting to be assigned to a Queue.
4. Dispatch Detail

This section will allow you to view detailed information regarding the
request selected in the Dispatch List.
This pane contains two tabs:
- Transaction Tab: Here you will find a listing of the
memos showing all of the activity for the selected request.
- Properties Tab: This section shows you all the general
information about the request depending on the properties selected in display
properties on the Dispatch View tab.
Note: An Attachments tab will also appear if Attachments have been made to a
request.
Dispatch
Fundamentals
Request Arrival in Dispatch
All requests which are submitted by non-privileged HelpSTAR Users are
automatically placed in Dispatch. In some circumstances privileged users may
also place requests in Dispatch (e.g. a support rep requesting re-assignment of
an erroneously dispatched request).
Whenever a new request arrives in ”Dispatch", all users with the Dispatch
privilege are sent a HelpSTAR Alert.
Viewing Requests in Dispatch
Users with the Dispatch privilege can view a list of requests currently in
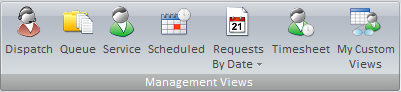
Dispatch by clicking the "Dispatch" button, which is available in the
”Workbench” group on HelpSTAR Service Request Ribbon.
The resulting listing will show all of the requests currently awaiting
dispatch to the relevant Queue
Folder or support rep.
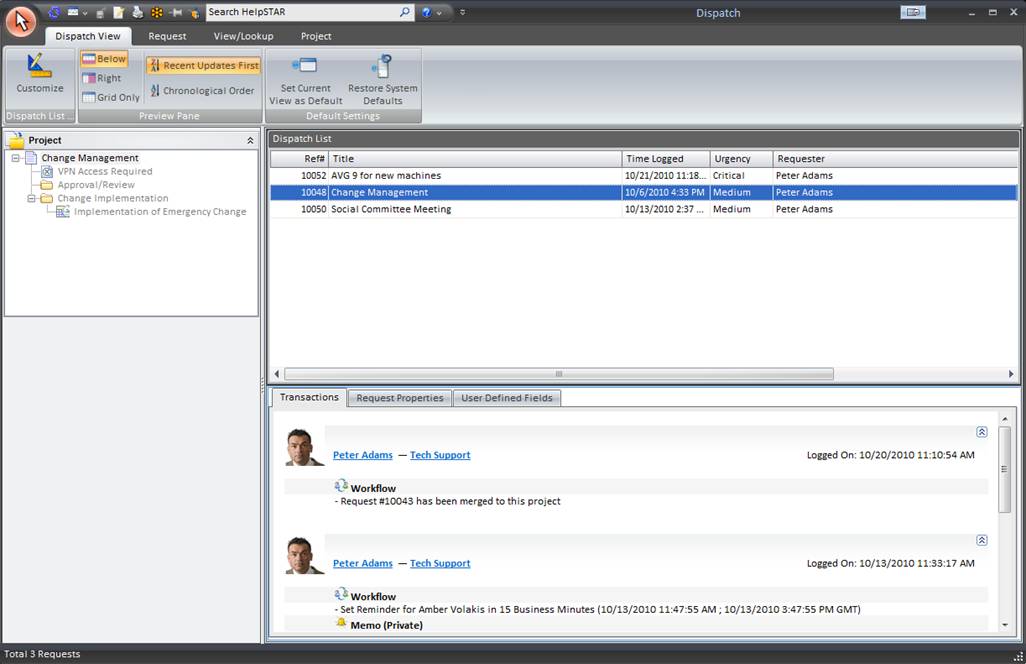
To dispatch a request, select the request from the ”Dispatch List” and select
the appropriate destination for the request from the ”Move To” Group.
- Queue Folder: The request will wait in the
designated Queue until accepted by a support rep.
- My Service: Moves the request to your
workspace.
- Another Rep’s Service: Moves the request to another
Rep’s workspace.
- Dispatch: Move the request to be triaged and
dispatched.
- Closed: The request is designated as complete and is
ready for approval.
The dispatcher should review the request's history and:
- Decide the appropriate priority.
- Set forwarding options of the request to the appropriate
Queue or Rep.
- Decide on scheduling options based on the given information
and the user's requested urgency.
While dispatching, the dispatcher can alter:
- Enter a Memo (guidelines) for the rep as to how to proceed
about providing service where applicable.
Next Steps
The next stage in the request's life cycle depends on the ’Forward To’
workflow option selected (which depends on the dispatcher’s privileges).
- To Queue: The request will wait in the designated Queue until accepted by a
support rep.
Back to top
See Also:
Adding a New Service Request
Adding a New
Project
Adding a New Purchase Request
Priority Escalation
How HelpSTAR Works
Assigning
Privileges