New Purchase Request
Overview:
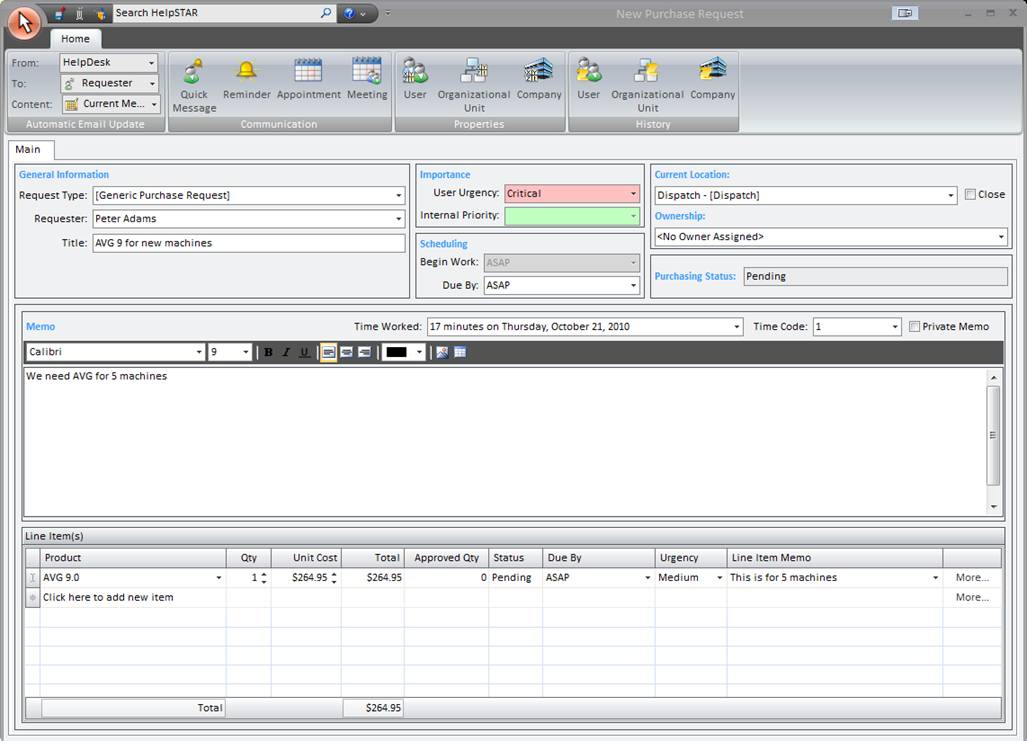
This section will guide you through adding a new purchase
request into the HelpSTAR system. This functionality can be used to
purchase new assets such as computers, office furniture, office supplies,
etc.

1. Ribbon Toolbar:

Automatic Email Update

- Updates: Specify whether automatic email updates
of the purchase request will be sent to the requester of the purchase request.
Communication

- Quick Message: Post a message from this request
to a specified party.
- Reminder: Schedule an automatic reminder
for yourself, or other support reps.
Properties

- User Properties: View user properties (i.e. User
name, organizational unit, phone number, etc.).
- Organizational Unit
Properties: View Organizational Unit properties (i.e.
Organizational Unit name, number of service requests from this organizational
unit, and a listing of users in the organizational unit).
- Company Properties: View Company properties (i.e.
Company name, number of service requests from this company, and a listing of
users in the company).
History

- User History: View a history of requests
submitted by the selected user during the date range that you specify.
- Organizational
Unit History: View a history of requests submitted by the
selected organizational unit during the date range that you specify when
clicking this button.
- Company History: View a history of requests
submitted by the selected company during the date range that you specify when
clicking this button.
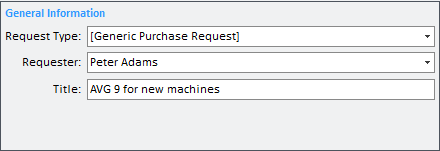
2. General Information:

- Request Type: Select the type of request you would
like to add. By default, the request type will be "Generic Purchase
Request". It is possible for you to create different request types
(i.e. Office Supplies, etc.) via User Defined Fields.
- Requester: Enter the name of the user who is
requesting service.
- Title: Enter a short description of the request.
It should be concise to facilitate title searches.
3. Importance:

- User Urgency: Request urgency as reported by
requester. Levels of urgency are as follows:
· Internal Priority: Requests priority as determined by the
dispatcher. Levels of priority are as follows:
4. Scheduling:

- Begin Work: Set a start date for working on this
request (optional).
- Due By: Set a deadline for completion of this request
(optional).
5. Current Location:

- Current Location: The current location of your request
– see "Move To" field (below) for an explanation of the options.
- Move To: Move this request to the appropriate
destination. A request can be moved to any of the following:
- Dispatch: Forward the request for review
so that it can be assigned the appropriate priority and forwarding/scheduling
options.
- My Service: Forward the request to be "In
Service" folder of the user moving the request. Only support reps have
this option.
- Queue Folder: Forward request to a shared queue
folder.
- Another Rep’s Service: Forward a request
directly to another support rep’s "In Service" folder.
- Close: Once the work on a request is completed,
the request should be closed.
6. Purchasing Status:

- Pending Status: This section is an un-editable field
which displays the status of your Purchase
Request. A purchase request can be any of the following states:
- Pending
- Declined
- Approved
- Partially Approved
- Ordered
7. Memo:

- Time Worked: Actual elapsed time request has been
worked on.
- Time Code: Support reps may select different time
codes for billing clients. Time codes can be associated with cost and
are set in User Privileges.
- Private Memo: If support reps do not want an update to
be visible to the end user, they may check this option.
- Memo: A full description of the problem. Enter
information relevant to the request. This will assist support reps in
viewing the history of a request.
8. Product Order Listing:

The "Product” drop-down field allows you to request products. After
choosing a product, the requester can edit the "Quantity". You will have
the option of selecting an "Urgency" and "Due By" date that are specific to this
product. The requester can also enter a "Memo" (optional) for this particular
product. You can repeat the process if you wish to request additional
products by clicking on the line below the last line completed line.
Once you have entered all the Purchase Order information, click on the Save
button in the Quick Access toolbar.
Back to
top
See Also:
Approve Purchase
Requests
Declined Purchase
Requests
Ordered
Purchase Requests
Receive Purchase
Orders
How HelpSTAR Works


