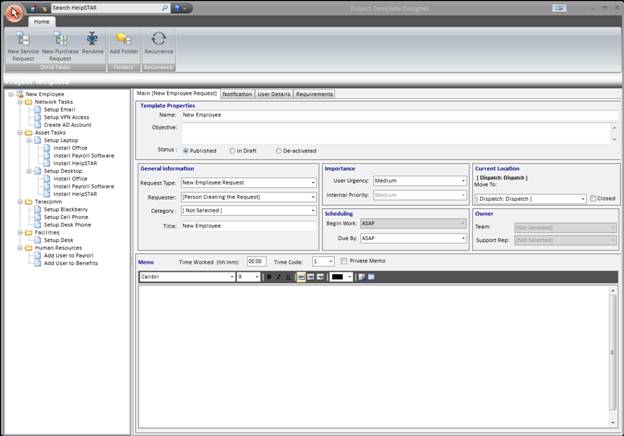
Projects can be created in HelpSTAR that will link a series of tasks together.
A Project is a task (request) that is comprised of child tasks which need to be fulfilled in order for the project (as a whole) to be completed.
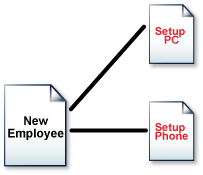
For example, a project can be created for ”New Employee” (as shown above). Setup PC, Assign Queues, Network Access and Install Apps are all child tasks of this project request. These child tasks must be completed in order for the project to be closed.
The Project Template Designer allows you to create a group of service requests (and purchase request) templates to manage multi-task activities such as setting up New Employees. Once a project has been designed, you can easily initiate the project by using the project template. It will create a group of requests that will notify the relevant support staff of the tasks for which they are responsible.


This area will show the structure of the project being created. This view will allow you to create folders to group similar tasks or create sub tasks for project tasks.
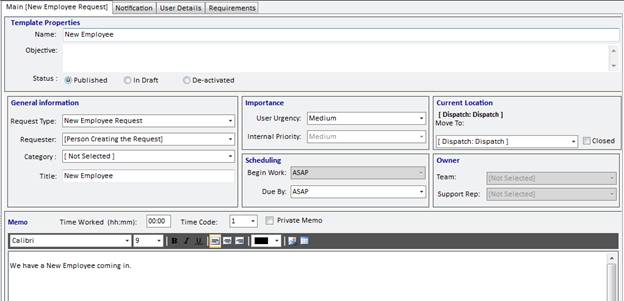
This section will allow you to add or modify properties of each task in a project.
To demonstrate the creation of a template, the example of New Employee Project (below) will be used.
1. Click the “Create New” option of Project Templates on the HelpSTAR Customization Tab. The following screen will appear:
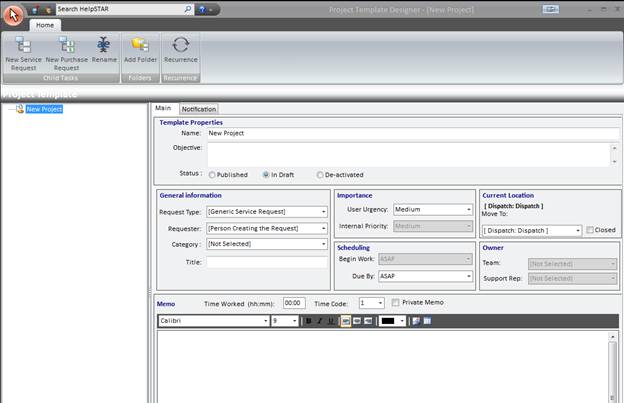
2. Enter the “Name” for the project template
3. In the “Objective” section, enter information as to the project objectives.
4. In the Status section, select the status you would like this request to assume:
5. In the "General Information” section fill in the following information which you would like to appear on your template:
6. In the "Importance” section, select the internal priority and requester priority you would like this template to default to.
7. In the "Scheduling” section, state the following:
8. Forward To: move this request to the appropriate destination. A request can be moved to any of the following:
9. In the Memo section, enter the following:
10. Click on save
11. On the Template Listing page, press the refresh button, and your project should show up under the Listing under the status you assigned to the template.
12. When selecting “Manage Existing Templates” on the HelpSTAR Customization tab, this project will appear in the “In Draft” section.
Now that we have created the project, let’s create one of the child tasks which are needed for this project (see below). For this example, we will create the ”Setup PC” child task:
On the Template Listing page, press the refresh button, and your project should show up under the Listing under the status you assigned to the template.
1. Click on “New Service Request” button from the Project Template Designer toolbar and enter name (in this case, “Setup PC”) in the Project Template List.
2. In the Request Properties section, select to create your subtask immediately (when project is created) or configure the subtask to not be created until one or more specific events take place.
3. In the “General Information” section, enter the following information to appear on your template:
4. In the "Importance” section, select the internal priority and requester priority you would like this request to default to.
5. In the "Scheduling” section, state the following:.
6. Forward To: move this request to the appropriate destination. A request can be moved to any of the following:
7. In the Memo section, enter the following:
8. Click on save
We have now created a project with a child request.
When creating a child task you have the ability to configure a task so that the child task is not created until one or more specific events take place. For example, in our ”New Employee” example (see image below), we have created a task called ’Setup PC’. The task ’Install Apps.’ cannot begin until the PC has been set up. So in this case, let’s create the ’Install Apps.’ task to initiate once the ’Setup PC’ task has been closed.
Use after events in HelpSTAR to automatically create new requests in a project template.
1. Double click on the project from the Template Listing.
2. Select the "New Service Request” button from the Project Template Designer toolbar and enter name (in this case, Install Applications') in the Project Template Listing.
3. In the Request Properties section, select to create your subtask immediately (when project is created) or configure the subtask so that it is not created until one or more
specific events take place. (Optional – we will do an example of this once this subtask is complete)
To do this, do the following:
a. Ensure that "Install Applications” is highlighted in the Project Listing.
b. Select "Create After Event", and the following window will appear:
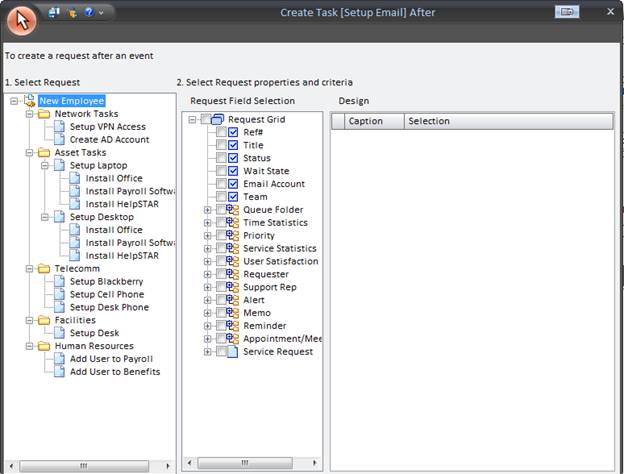
c. Ensure that "Setup PC" is highlighted in the Project Tree-view.
d. Select the Status checkbox and the following window will appear:
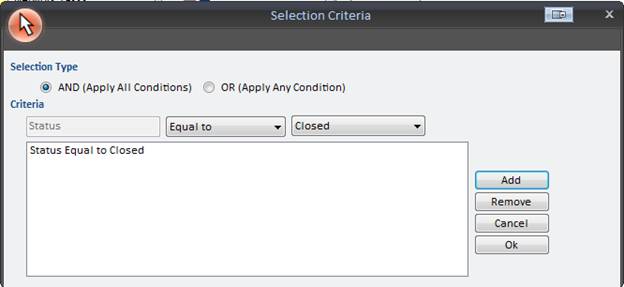
e. Set this to "Status” "Equal to” "Closed” and then press the Add button.
This means that once the "Setup PC" task is set to "Closed”, the "Install Applications" task will be initiated.
3. When taken back to the Create Task window, press save to be taken back to the Project Template Designer window.
4. In the "General Information” section fill in the following information which you would like to appear on your template:
5. In the "Importance” section, select the internal priority and requester priority you would like this request to default to.
6. In the "Scheduling” section, state the following:
7. Forward To – move this request to the appropriate destination. A request can be moved to any of the following:
8. In the Memo section, enter the following:
9. Click Save
Now that we have completed all these steps, we have created a project with two child tasks ’Setup PC’ and ’Install Applications’. We have also configured this project so that once the ’Setup PC’ task is set to the ’Closed’ status, the ’Setup PC’ task will be initiated.
See Also:
Using the User Defined Field Designer
Managing Existing Project Templates