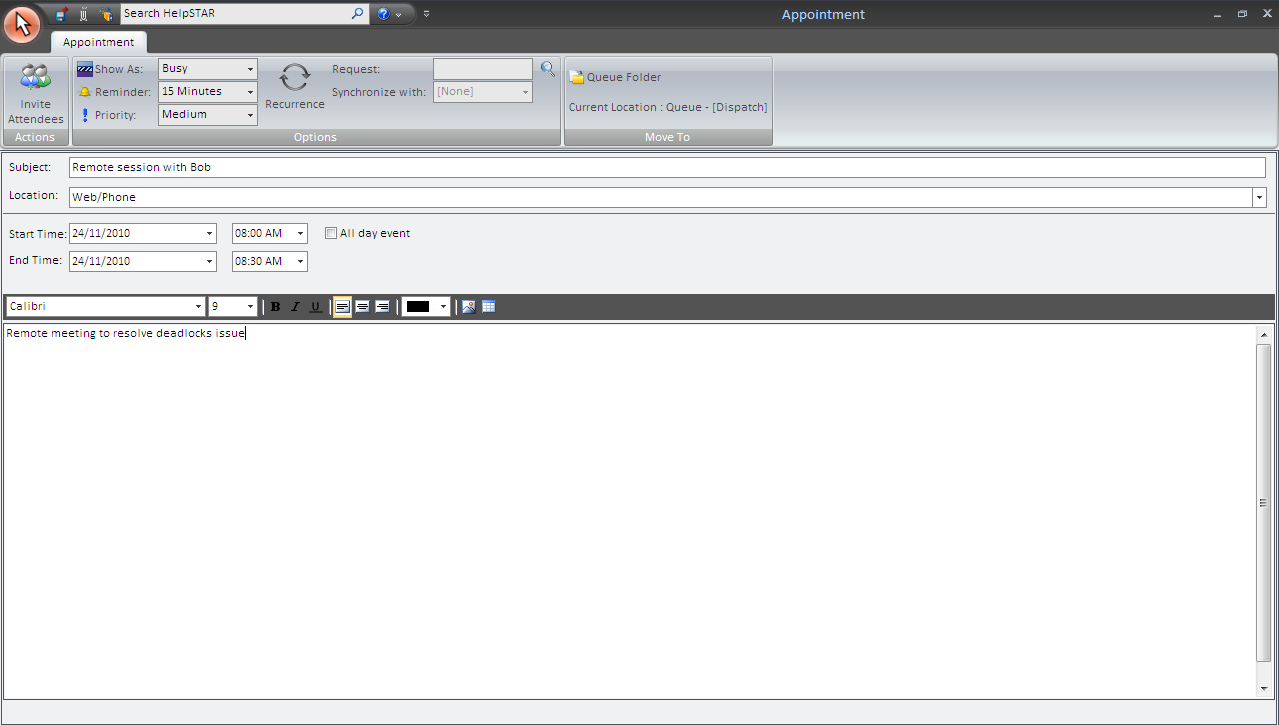
Calendaring offers the ability to create scheduled appointments in relation to a Service Request in HelpSTAR. Appointments are tasks that involve just the creator and do not require additional resources (such as other users).


This section allows you to invite attendees to an appointment. Note: once additional participants are selected, an appointment is converted to a meeting.
Show As: Set an availability status to other users viewing your calendar. Options are free, busy, tentative and out of office.
Reminder: Set HelpSTAR to send attendees a reminder at a selected time frame before an appointment.
Reminder: Set HelpSTAR to send attendees a reminder at a selected time frame before an appointment.
Priority: Set the internal priority of an appointment.
Recurrence: Set a repetitive schedule for an appointment.
Request: Find the request that an appointment is being created for. Note: If this field is left blank, a new request will be created for this appointment. The request will be set to In Service of the appointment creator.
Synchronize With: Set a request’s wait state to be synchronized with the time scheduled for an appointment.
Private: Set if the memo added to a request for this appointment should be viewable by an end user.

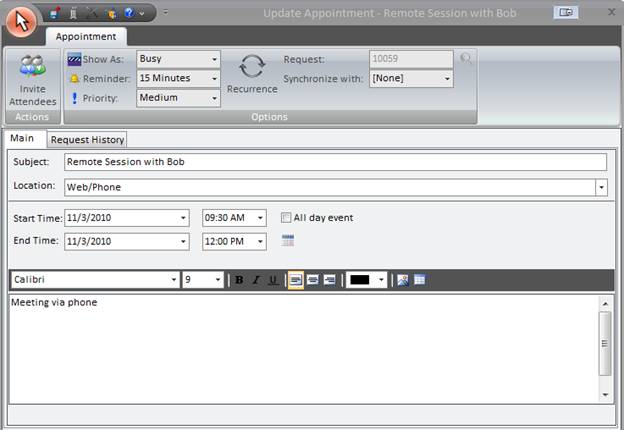
The Appointment window features an Appointment tab that allows you to enter details. The Request History tab allows you view the memo updates made to the request that an appointment was created for. Note: the Request History tab will only appear when viewing a previously created appointment.
Subject: Enter a description or objective for an appointment
Location: Enter a description of where an appointment is taking place
Start Time: Enter scheduled begin time of appointment
End Time: Enter the scheduled end time of the appointment
All Day Event: Check this option if an appointment is scheduled for the entire business day
Memo Field: Enter additional information for an appointment. Note: A memo must be entered for this appointment to be saved
1. The HelpSTAR Calendar can be launched by:
a. Clicking on the Calendar icon under Workbench Options on the Service Request tab.
b. Clicking on the Appointment icon on the home tab of a Service Request in update mode.

3. Click on New option under Appointment options on the toolbar.

4. Enter the Subject and Location for the appointment.
5. Confirm the time selected for appointment is correct.
6. A memo must be added to an appointment to be saved.
7. Click on the Save icon in the ribbon.
From the HelpSTAR Calendar, double click on a scheduled appointment or click on Update under the Appointment Options.

Updates to an existing appointment can also be made from within a request. Click on a ”View Appointment” link for a request history.
A detailed view of the appointment will be launched. Click on the ”Update Appointment” icon to modify the appointment details.
See Also: