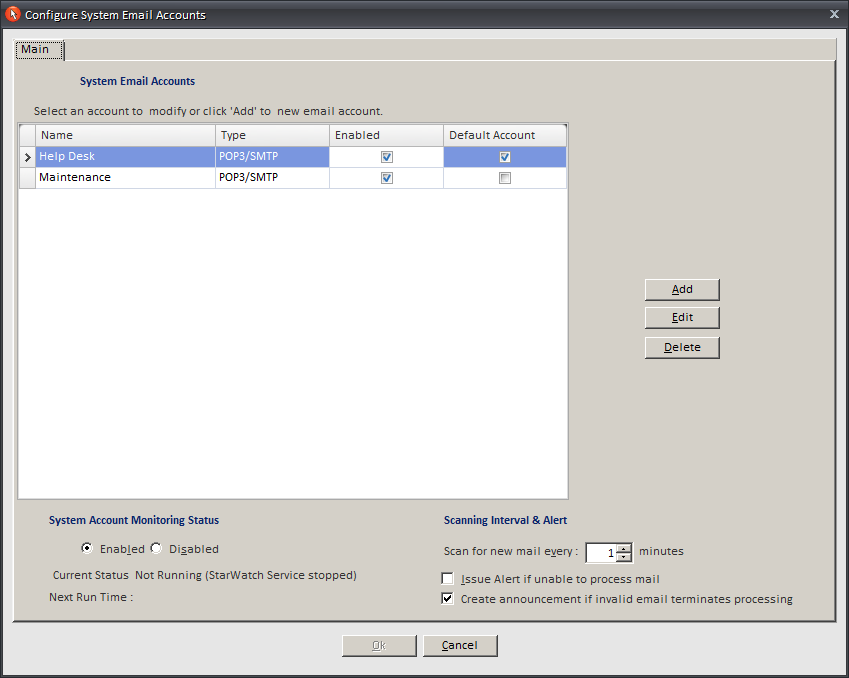
This section allows you to configure the System Email Account settings. This process is essential in allowing HelpSTAR to process incoming email requests, send reply messages, notify requesters of updates to their open requests and send outgoing request details. Note that you can add multiple email accounts so that users can submit requests to different addresses. For example, all email received by your helpdesk, itsupport@yourorganization.com, will be processed by HelpSTAR.
Once the System Email Accounts have been configured HelpSTAR can automatically create requests from incoming emails


In this section, add or select an email account which can be edited or deleted as well as enabled or disabled. An email account can also be set at the default account.
Note: To edit an email account, click on and highlight the email account to edit, and then click Edit.
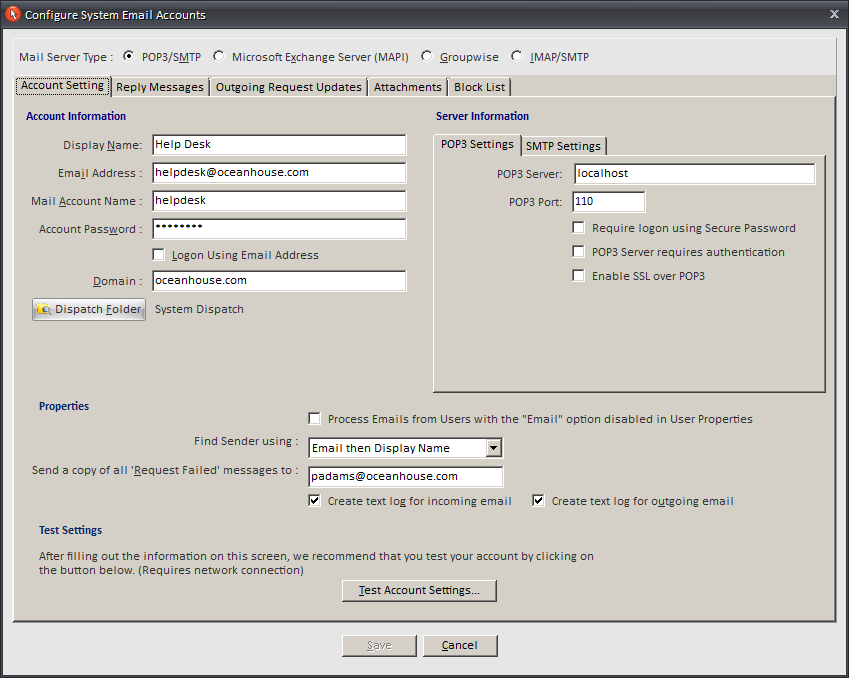
When adding or editing an email account, the following window will appear:
![]()

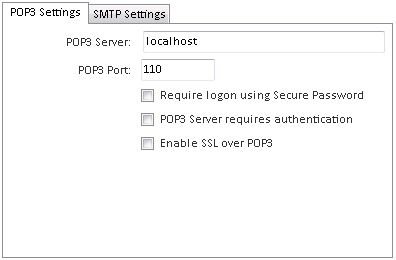
SMTP Server Tab:
Properties
When service requests are submitted via email, the System Email Account may fail to process some of them under certain circumstances. If this occurs, you can have the System Email Account forward copies of the failed email to a specified address, such as your own. By doing this, you will be aware of any requests that are not accepted by the System Email Account.
By default, "Text Logs" will be created for both incoming and outgoing email. You can disable the corresponding check boxes if you don’t want to System Email Account to create these files (see Log Files for more details).
You should click the "Test Account Settings" button when you have finished the configuration. This will confirm whether or not your settings are correct.
Note: If "Microsoft Exchange Server (MAPI)” is selected, the Account Setting tab will change to display the following:
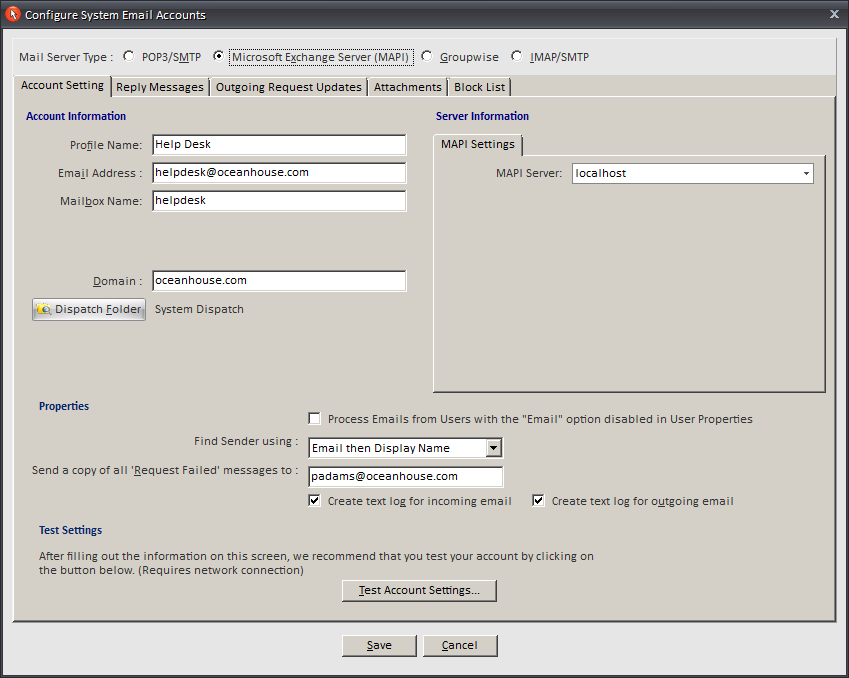
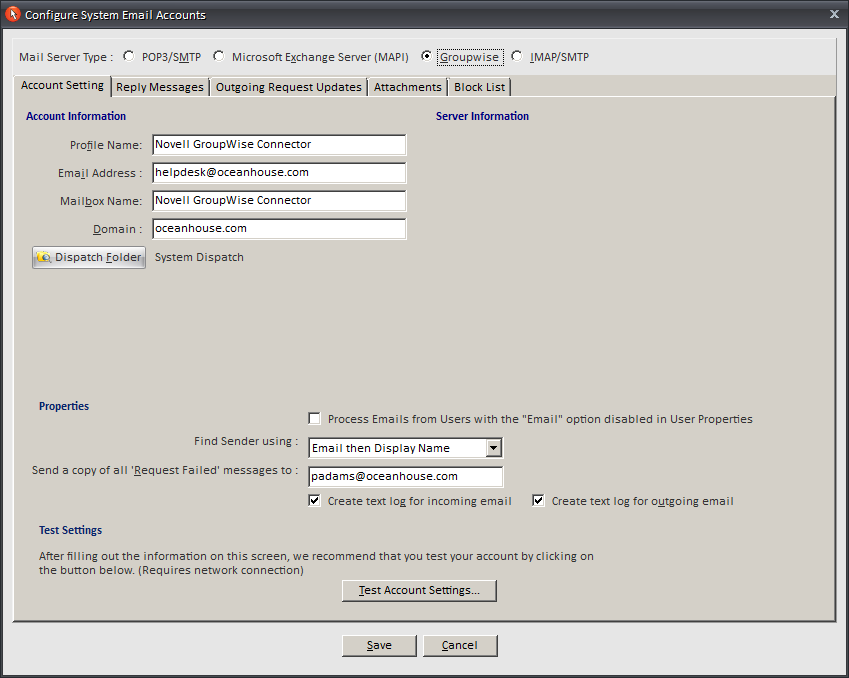
Note: If “Groupwise” is selected, the Account Setting tab will change to display the following:
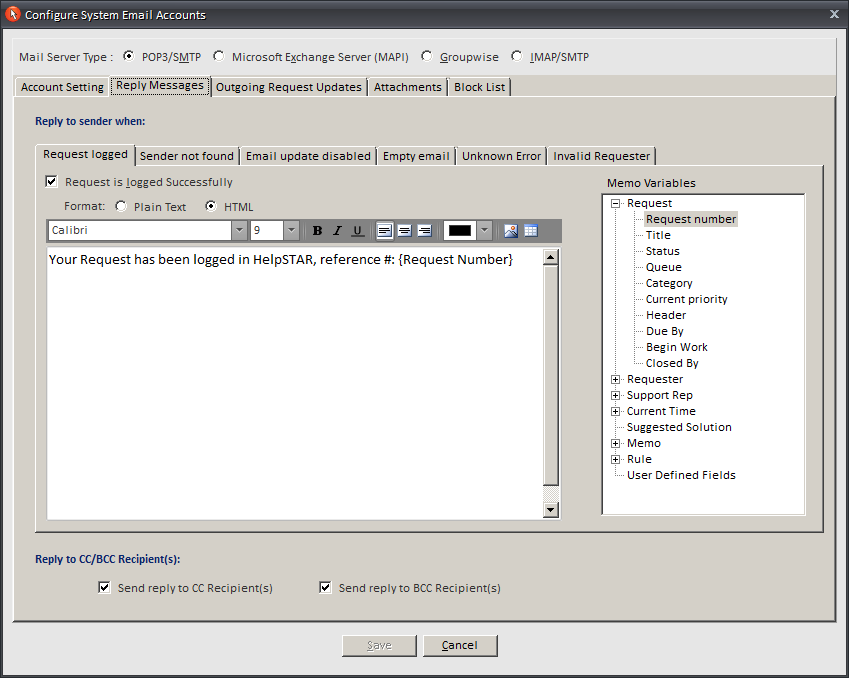
For each System Email Account you have configured, custom reply messages can be created. Reply emails are sent to requesters for all email requests, regardless of whether the email request was successful (a confirmation email that includes the request number), or not (a "Request FAILED" email).
The "Request is logged successfully” field shows the default message that is sent when an email request is successfully logged. The remaining four fields show the default "request failed” messages for different types of email processing failures. You can edit these messages and include specific variables if you wish.
Note: All options are enabled (checked) by default. You can disable any of these checkboxes if you do not want request confirmations to be sent to requesters.
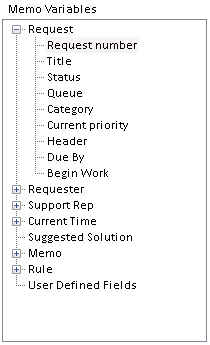
If you click on the “Variables” button, a prompt will appear with a listing of variables which are available for use in the email replies. Variables are case sensitive and must be capitalized.
Note: Regarding failed requests, a System Email Account can be configured (on the "Account Settings" tab) to forward copies of all failed requests to a specified email address, such as to an administrator. By doing this, you can monitor any requests or emails not accepted by that System Email Account.
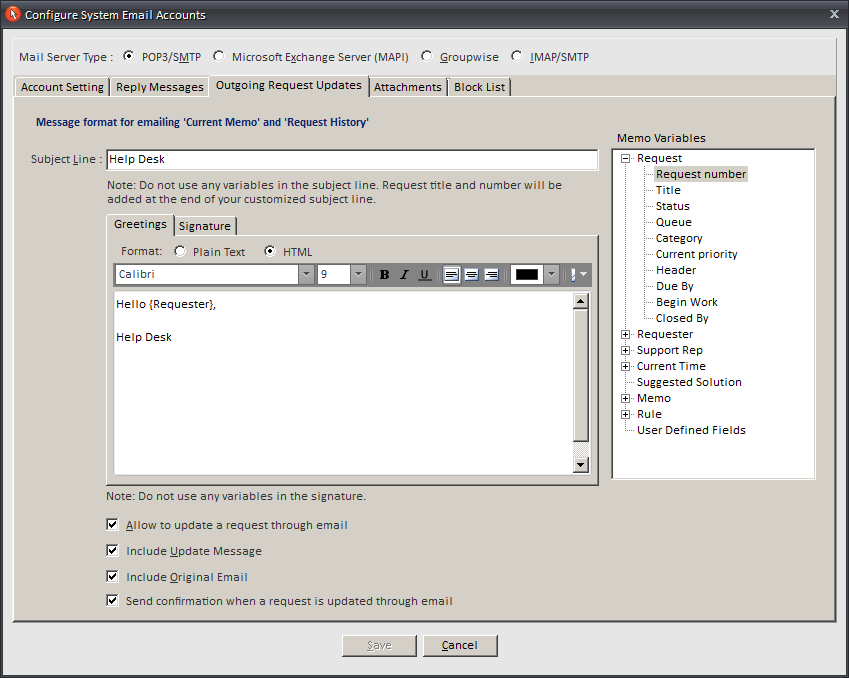
For each email account that is configured, custom messages can be created for outgoing service request updates. The above screenshot shows the default Greetings, Subject Line and Signature settings. These can be modified/customized to meet the needs of your organization.
The option of using variables in the “Greetings” of messages is also available. Acceptable variables are indicated by clicking the Variables button, which brings up a listing of recognized variables. The variables are case sensitive and must be capitalized.
By default, requesters who are Interactive Users can update their own requests by replying to HelpSTAR's outgoing email updates. HelpSTAR's outgoing email informs them of this option by including the statement: "To update your request via email click on 'Reply' and delete the original text to avoid redundancy."
If you don’t want requesters to be able to update their service requests via email, simply uncheck the box labeled "Allow to update a request through email" (at the bottom of screenshot shown above). Now if your users try to update their requests by replying to HelpSTAR's email updates, they will receive a message that states: "Failed to Update your request. Our Help Desk does not accept updates on your request via email."
Note: The above "messages" are not customizable.
By default, when a System Email Account receives incoming email requests containing file attachments it will log new HelpSTAR service requests but will ignore the attachments. In such instances, it replies with an "Attachment Ignored" message. However, each System Email Account can be configured process email containing attachments.

As shown above, incoming email containing attachments may be handled in one of three ways:
Note: You have the option of using variables in the "Ignored Attachments Message". Acceptable variables are indicated by clicking the "Variables" button, which brings up a listing of recognized variables. The variables are case sensitive and must be capitalized.
There is no limit to the size of attached files if your mail system is MAPI. For SMTP systems the total size of the files that can be attached to an email is 10 MB. Whenever attachments exceed these limits, the senders will receive a "Failed Mail” message and no request will be created, no matter which of the three options (shown above) is in effect.
An Attachment Filter allows you to block specific file types. By default, it blocks .BAT, .COM, .EXE, .JS, .SWF and .VBS files. To specify more file types to block, enter the extension characters and click the "Add" button. To remove file types from the list, simply select the extension and click the "Remove" button.
By default, a System Email Account will block incoming email starting with "RE:", "FW:" or "UNDELIVERABLE:" in the subject line. This is intended to prevent endless loops in cases where Reply Messages are being sent to requesters who have set auto replies.
You can specify additional character strings to block other types of incoming email by configuring the "Block List".
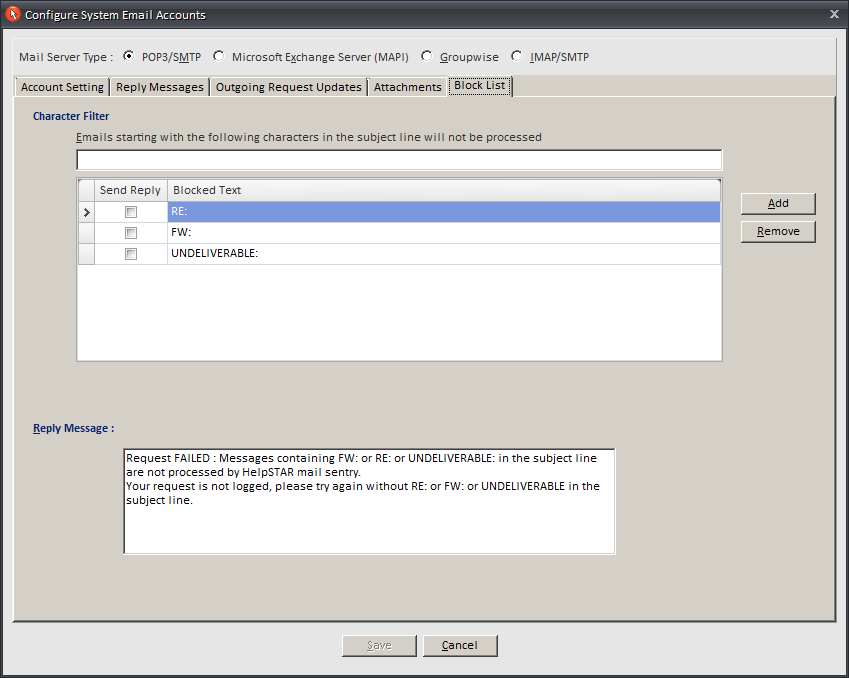
Character Filter
To block other types of email, simply enter the characters that will be found at the start of the subject line, click the "Add" button to add them to the Character Filter, enable the checkbox and click "Save". You can also disable checkboxes or remove starting character strings from the filter, but be careful if you want to uncheck or remove the default character filters ("RE:", "FW:" or "UNDELIVERABLE:") because of the danger of causing endless loops.
The Reply Message field allows you to enter text that you would like to send in the email body when an email is received and contains the characters listed in your filter. Note that if you modify the Character Filter List you should also edit the "Reply Message" to reflect your changes.
Once you have made all the desired changes, click on Save.

This section allows you to set whether the Account selected is enabled or disabled. Also, view the current status and the next run time of the configuration.

This section allows you to set the "Scan Interval" to establish how often HelpSTAR should scan the email account that you have created and enabled.
The "Issue alert if unable to escalate requests" checkbox is enabled by default, and will broadcast alert messages to all privileged users logged onto HelpSTAR’s Windows interface in the event that priority escalation stops working ("Issue Alert" can be un-checked to stop the Alert message from continually repeating).
See Also: