HELPSTAR®2012 Installation
Procedures
Contents
Part 1 - Deployment
Server and Database Setup
Attachment
Storage in HelpSTAR
Part 2 - Windows
Client Installation (Server)
Part 3 - StarWatch
Service
Part 4 - Business
Rules Engine
Part 5 - Network
Audit Engine Installation & Configuration
Client
Audit Add-In Installation & Configuration
Part 6
- HelpSTAR Web Components
HelpSTAR
.Net Web Portal Installation
Web
Portal Customization
HelpSTAR
Password Reset Installation
HelpSTAR
SharePoint Portal Installation
Part 7 - Windows
Client Installation (Workstation)
Part 8
- Importing Users from Active Directory
Part 9 - System Email
Configuration
System
Email for SMTP/POP3
System
Email for MAPI
System
Email using GroupWise
System
Email using IMAP/SMTP
Additional
Resources
Part 1 – Deployment Server and Database Setup
Deployment Server Installation Prerequisites:
-
Microsoft .Net Framework 3.5 is required for the installation of
HelpSTAR2012. When installing HelpSTAR components from
another machine, you will either be prompted to download the required setup
files from the Internet if not previously installed.
-
A valid Internet connection is required to activate the HelpSTAR
software. If one is not present, you will be required to email an XML
file created by the installation software to HelpSTAR. Once this file is
created, you will email it to hsregister@helpstar.com and another
XML file will be sent to apply to your HelpSTAR installation.
-
Windows Installer must be updated to Version 4.5 prior to installing the
application. It is recommended to do this beforehand as this update
requires a reboot of the server. For more information, visit the link
below:
http://support.microsoft.com/kb/942288
-
Ensure that SQL Server is installed prior to the installation.
Supported versions are:
-
SQL Server 2005 (Express, Standard, Workgroup or Enterprise Edition)
-
SQL Server 2008(Express, Standard, Workgroup or Enterprise Edition)
-
SQL Server 2008 R2(Express, Standard or Enterprise Edition)
-
64-Bit versions are supported
-
During installation of SQL Server, note the mode selected for
authentication (Windows Authentication or SQL). If using SQL
authentication, the SA password will be required to create the HelpSTAR
database.
-
SQL Server FullText Search Service must be started on the database server
for the use of the HelpSTAR Search Engine functionality.
Deployment Server Installation:
-
On the server that will be hosting the
HelpSTAR2012application, run the evaluation file.
-
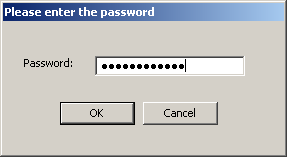
When prompted, enter the installation password. Click OK.
-
-
-
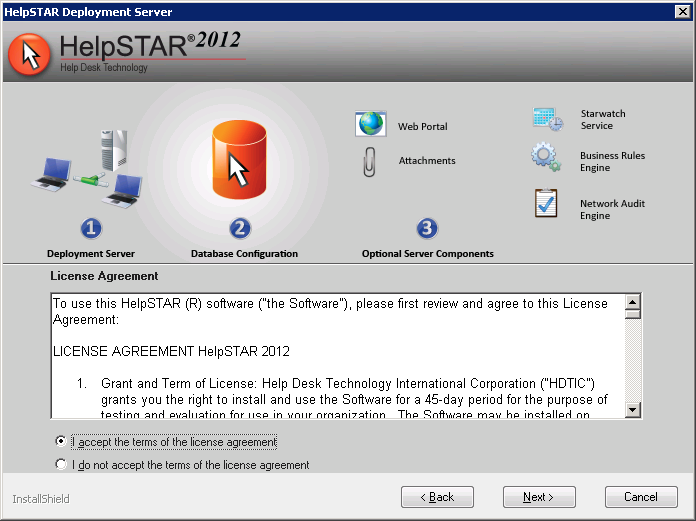
To proceed with the installation, review and accept the license agreement
terms. Click Next.
-
-
-
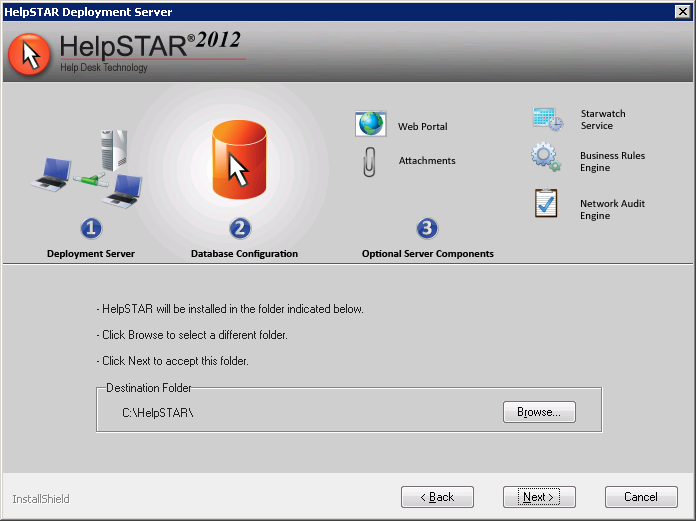
Specify the location in which the HelpSTAR2012Deployment
Server files will reside. A default location will be provided
(C:\HelpSTAR\). This can be altered by clicking on the Browse
button. Click Next.
-
Database Setup for SQL Authentication:
-
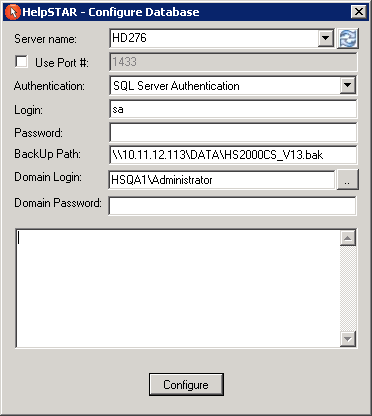
Upon completion of the Deployment Server installation, the HelpSTAR
database setup will begin. A prompt to “Configure Database” will appear
(as shown below).
-
The following fields must be entered to configure your HelpSTAR
Database:
-
Database Server: Enter the name or IP address of your SQL
server.
-
Use Port #: Port 1433 will be used by default. To select a
different port, check this box and it will allow you to enter a Port# of
your choice.
-
Authentication: Select the desired authentication mode for your
HelpSTAR Server
-
Login: The use of a SA user login will be required when
configuring your HelpSTAR database for SQL Authentication.
-
Password:Enter your SA password.
-
BackUp Path:A database can be restored to HelpSTAR with
pre-populated configurations. This database will be stored in the
default location specified here. This is hard-coded and cannot be
edited.
-
Domain Login/Password: Enter your domain login and
password.
-
Click on Configure when all information has been entered.
-
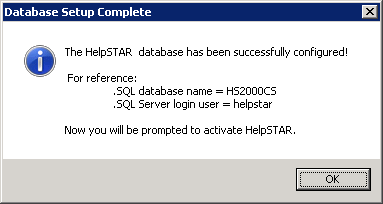
The database setup will proceed. A prompt confirming database
creation has been completed will appear.
-
Click on OK to exit the database setup.Upon completion, you will be
prompted to activate HelpSTAR.
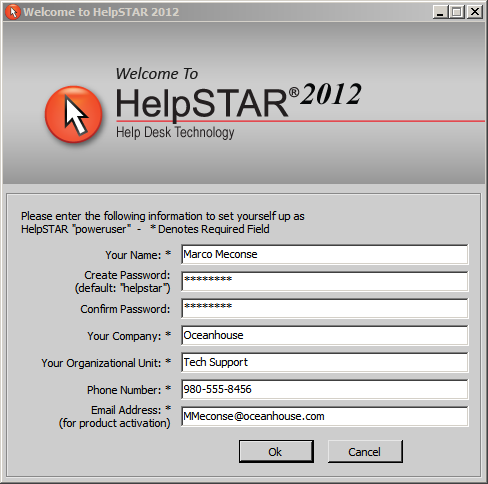
-
Enter your user and company information. This user will be added as
the first Power User in HelpSTAR. Click OK to complete the
activation.
-
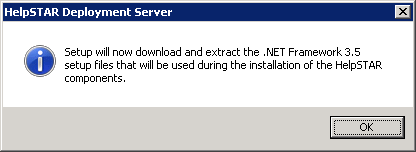
Once you have added your first Power User, the installation will attempt to
download and extract files for Microsoft .Net Framework 3.5. Click on
OK to proceed.
-
A confirmation will appear upon successful completion of the Deployment
Server installation.In this prompt, you will also receive information
regarding where your Attachments* will be stored for your HelpSTAR
installation.
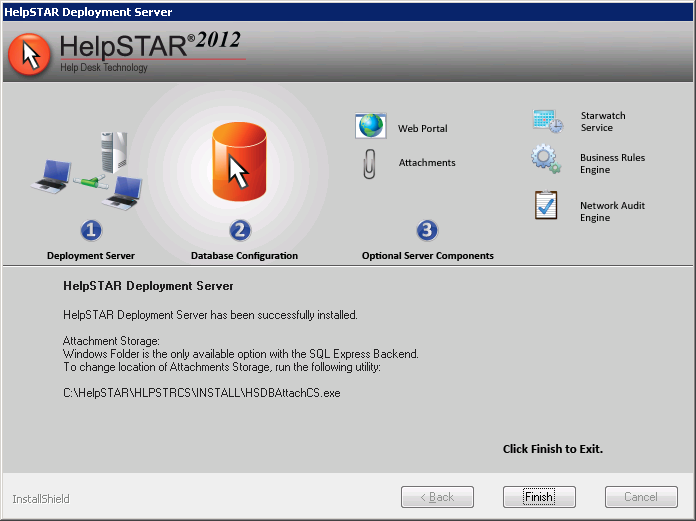
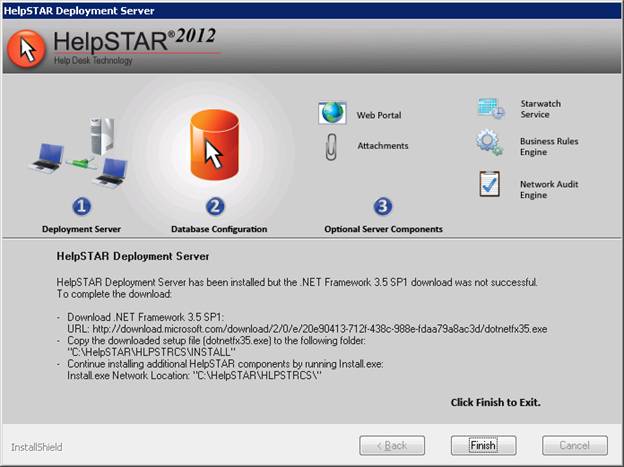
If no Internet access is detected, you will receive the following prompt
listing alternate ways to install Microsoft .Net Framework 3.5. Click on
Finish to exit the Deployment Server installation.
Database Setup for Windows Authentication:
-
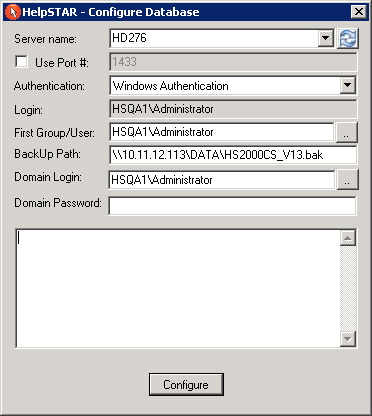
Upon completion of the Deployment Server installation, the HelpSTAR
database setup will begin. A prompt to “Configure Database” will appear
(as shown below).
-
The following fields must be entered to configure your HelpSTAR
Database:
-
Database Server: Enter the name or IP address of your SQL
server.
-
Use Port #: Port 1433 will be used by default. To select a
different port, check this box and it will allow you to enter a Port # of
your choice.
-
Authentication: Select the desired authentication mode for your
HelpSTAR Server.
-
First Group/User:Enter a group or user that will be authenticated
to the HelpSTAR database.
-
BackUp Path:A database can be restored to HelpSTAR with
pre-populated configurations. This database will be stored in the
default location specified here. This is hard-coded and cannot be
edited.
-
Domain Login/Password: Enter your domain login and
password.
-
Click on Configure when all information has been entered.
-
The database setup will proceed. A prompt confirming database
creation has been completed will appear.

-
Click on OK to exit the database setup.Upon completion, you will be
prompted to activate HelpSTAR.
-
Enter your user and company information. This user will be added as
the first Power User in HelpSTAR. Click OK to complete the
activation.

-
Once you have added your first Power User, the installation will attempt to
download and extract files for Microsoft .Net Framework 3.5. Click on
OK to proceed.

-
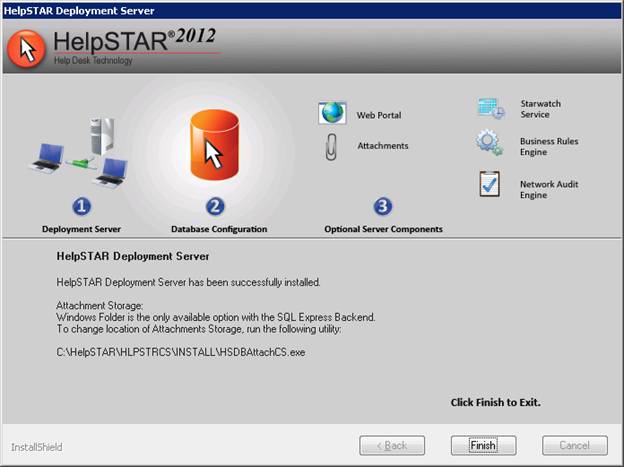
A confirmation will appear upon successful completion of the Deployment
Server installation. In this prompt, you will also receive information
regarding where your Attachments* will be stored for your HelpSTAR
installation.
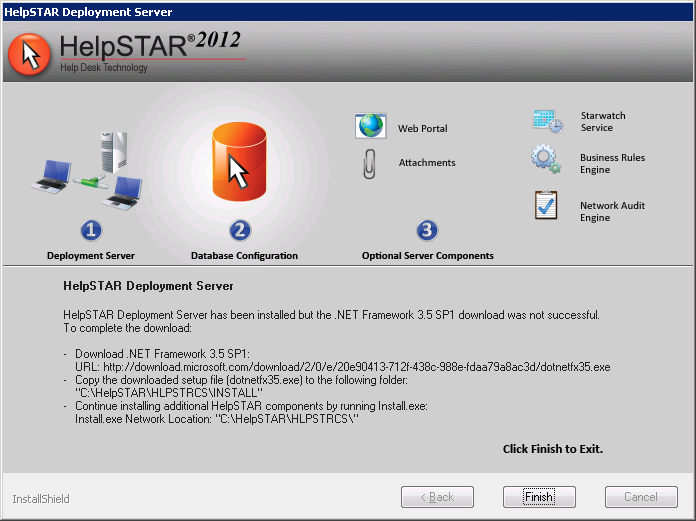
If no Internet access is detected, you will receive the following prompt
listing alternate ways to install Microsoft .Net Framework 3.5. Click on
Finish to exit the Deployment Server installation.
Attachment Storage in HelpSTAR
*HelpSTAR offers the ability to add documents and files to your HelpSTAR
objects. This functionality is automatically installed as part of the
Deployment Server installation.
There are 2 storage options for Attachments in HelpSTAR:
-
-
HelpSTAR Database
By default, Attachment Storage will automatically be configured to be
stored in the HelpSTAR Database.
When attachments are stored in the SQL database, they will be included
whenever you back up or move your database. However, the size of your database
will increase proportionately with the use of attachments.
-
Windows Folder
Attachment Storage is automatically configured for the HelpSTAR
database. If desired, you will have the option to change the storage
location.
The following executable can be run to change the storage location:
C:\HelpSTAR\HLPSTRCS\Install\HSDBAttachCS.exe
If you elect to store Attachments in the \Attachments folder, they will not
affect the size of your HelpSTAR database.However, to preserve these
attachments you must ensure that this folder is continually backed up.
If your backend database is stored using SQL Server 2005/2008 Express, the
database option is not available. You must run the above executable to
change your Attachment Storage option to a Windows folder.
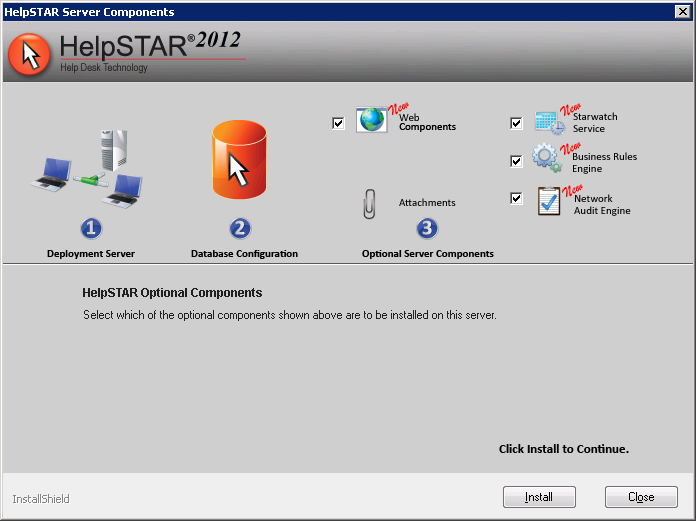
Once the Deployment Server installation has completed, the install.exe
component installer will automatically launch. From the below screen, you
can choose which components you will be installing upon this server. Once
you have selected the components to install, click Next to proceed.
You can also choose to install any of these components at a later time by
navigating to:
\HelpSTAR\HLPSTRCS\Install.exe
-
At this point, you will also be prompted to proceed with Windows Console
installation:
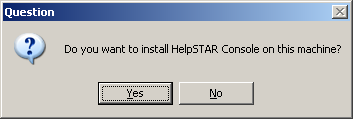
Click Yes to proceed.
Part 2 –WindowsClient Installation (Server)
The Windows Client is the workstation-based interface that you will access to
work in and administer HelpSTAR.
Windows Installer must be updated to Version 4.5 prior to installing the
Windows Client. It is recommended to perform this installation prior to
attempting the Windows Client installation on the deployment server or any
workstation at this requires a reboot of the machine. For more
information, visit the link below:
http://support.microsoft.com/kb/942288
Windows Client Installation:
-
Upon completion of activation, you will be prompted to install HelpSTAR’s
Windows Client:
-
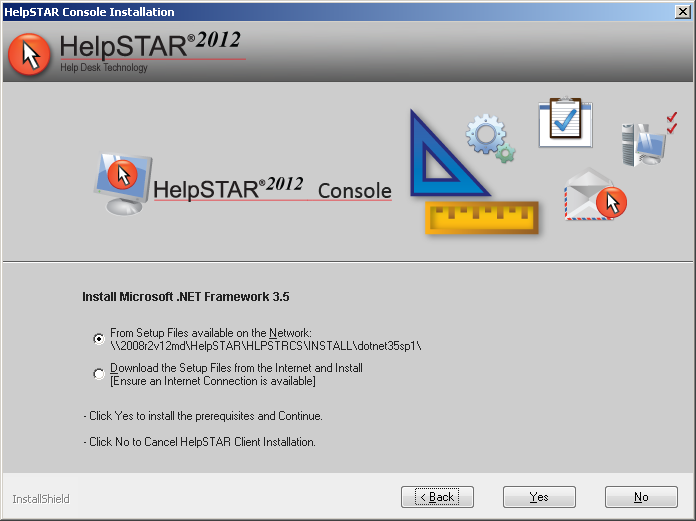
If Microsoft’s .Net Framework 3.5 is not installed, you will be prompted to
install it. Specify if the Microsoft .Net Framework 3.5 setup files
should be used from a location on the network or downloaded from the
Internet. Click Yes to proceed with the framework
installation.
-
-
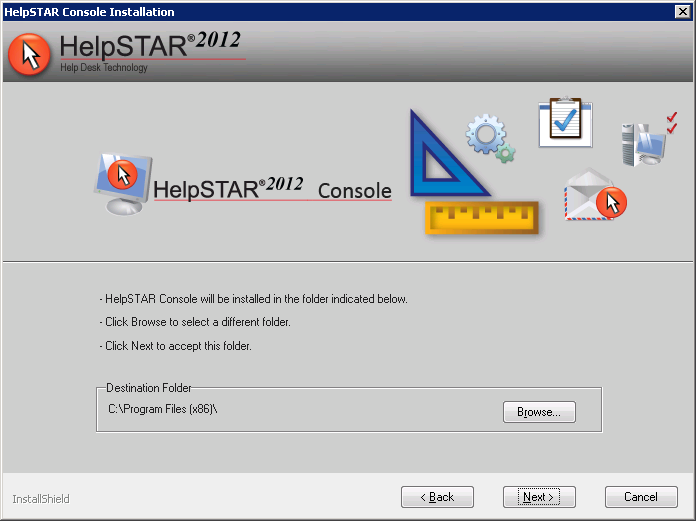
Specify the location in which HelpSTAR2012client files
will reside. A default location will be provided (C:\Program
Files\). This can be altered by clicking on the Browse
button. Click Next.
-
-
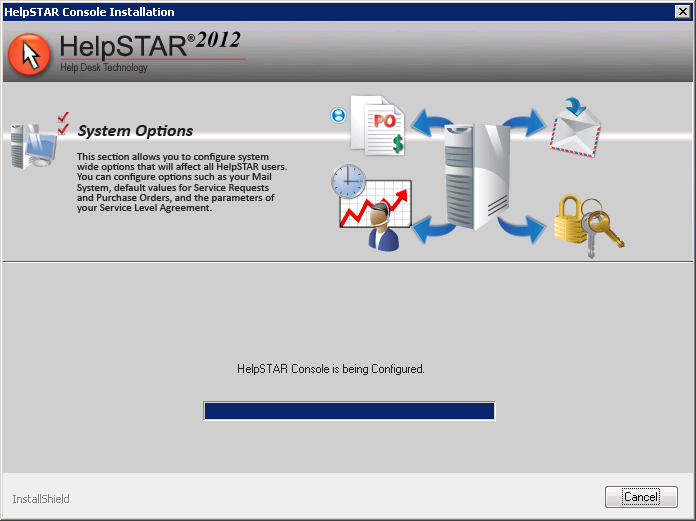
The Windows Console will proceed with the installation until it reaches the
next component to be installed.
-
-
Part 3– StarWatchService
HelpSTAR’s StarWatch service is a background component that is required for
many of the monitoring activities that affect workflow. These activities
include generating alerts, automatic email updates, processing incoming/outgoing
emails, request scheduling and Active Directory import/synchronization.
HelpSTAR StarWatch Installation Prerequisites:
-
On the server in which you want to install the StarWatch Service, navigate
to the HelpSTAR Deployment Server folder (\HelpSTAR\HLPSTRCS\).
-
Click on the Install.exe file.
-
Check the StarWatch Service option and click Next.
-
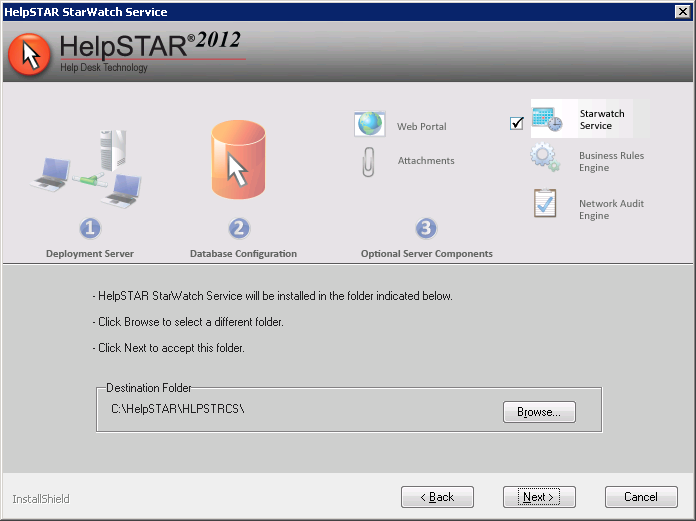
Specify the location in which StarWatch Service files will reside. A
default location will be provided (C:\HelpSTAR\HLPSTRCS). The location
can be altered by clicking on the Browse button. In the location
specified, the subfolder\Modules\StarWatch will be created in this
folder. Click Next.
-
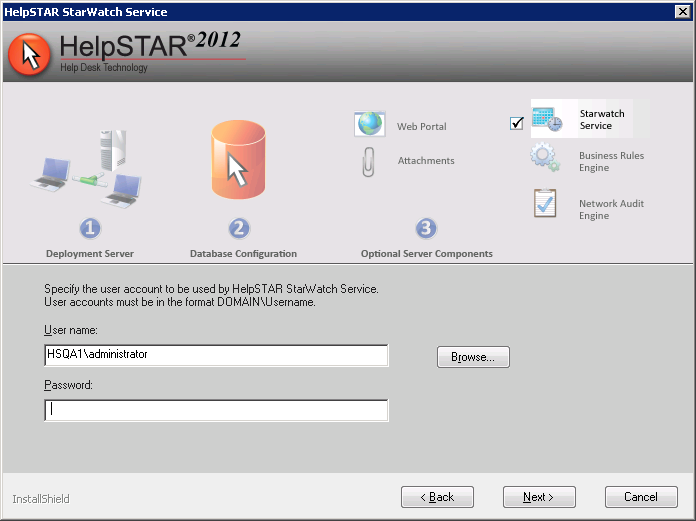
Specify the domain user under which the StarWatch service should be
running.
-
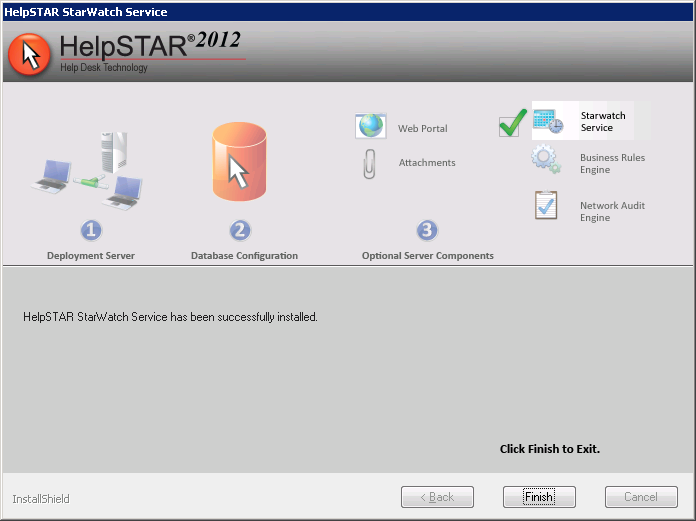
A confirmation will appear upon successful completion of the StarWatch
Service installation.
Part 4– BusinessRules Engine
HelpSTAR’s Business Rules Engine is a required service for the use of
HelpSTAR’s Business Rules functionality.
-
On the server in which you want to install the Business Rules Engine,
navigate to the HelpSTAR Deployment Server folder (\HelpSTAR\HLPSTRCS\).
-
Click on the Install.exefile.
-
Check the Business Rules Engine option and click Next.
-
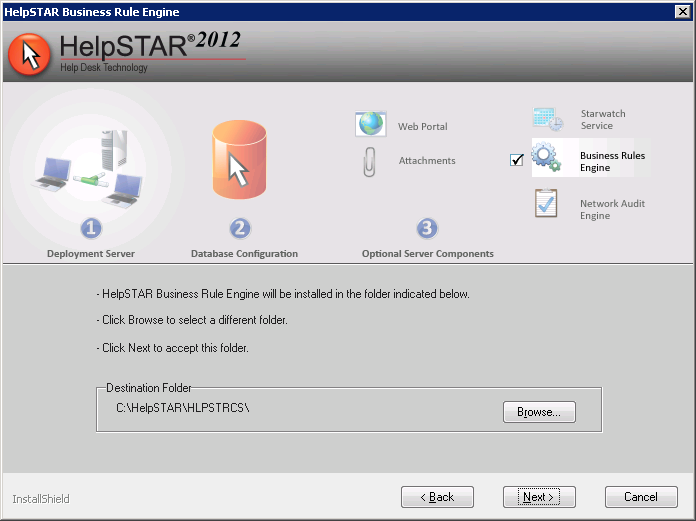
Specify the location in which Business Rules Engine files will
reside. A default location will be provided
(C:\HelpSTAR\HLPSTRCS). The location can be altered by clicking on the
Browse button. In the location specified, the subfolder
\Modules\RuleService will be created. Click Next.
-
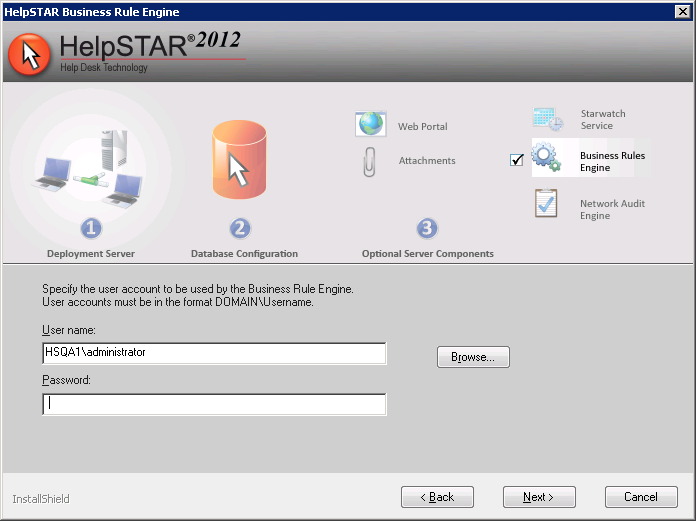
If using NT authentication, you will be prompted to specify the domain
account that this service will be run under.
-
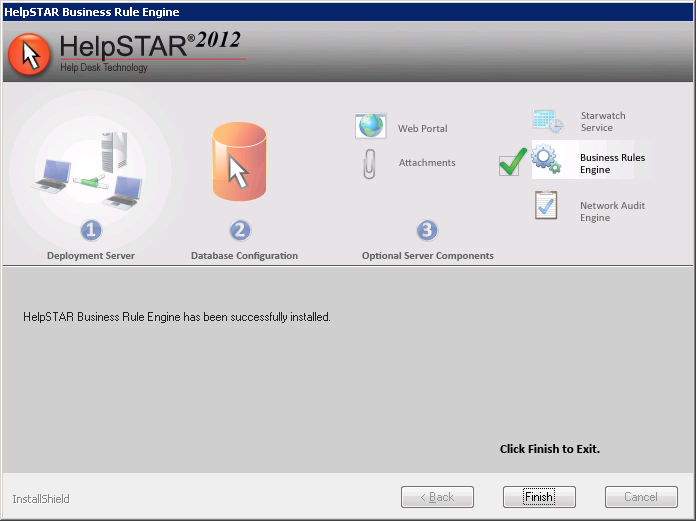
A confirmation will appear upon successful completion of the Business Rules
Engine installation.
Part 5– NetworkAudit Engine Installation &
Configuration
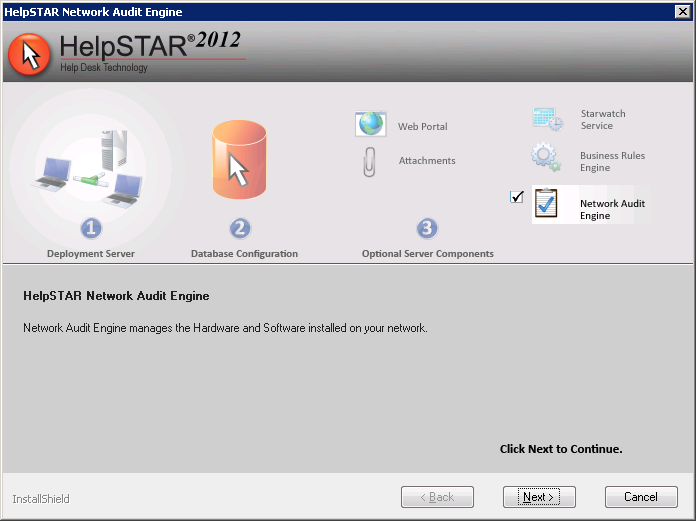
Using the Network Audit Service, you can remotely collect detailed hardware
and software information about the machines on the networks you manage.
This information is automatically stored in the HelpSTAR database.
Network Audit Engine Installation Prerequisites:
Network Audit Engine Installation:
-
On the server in which you want to install the Network Engine, navigate to
the HelpSTAR Deployment Server folder (\HelpSTAR\HLPSTRCS\).
-
Click on the Install.exe file.
-
Check the Network Audit Engine option and click Next to proceed.
-
-
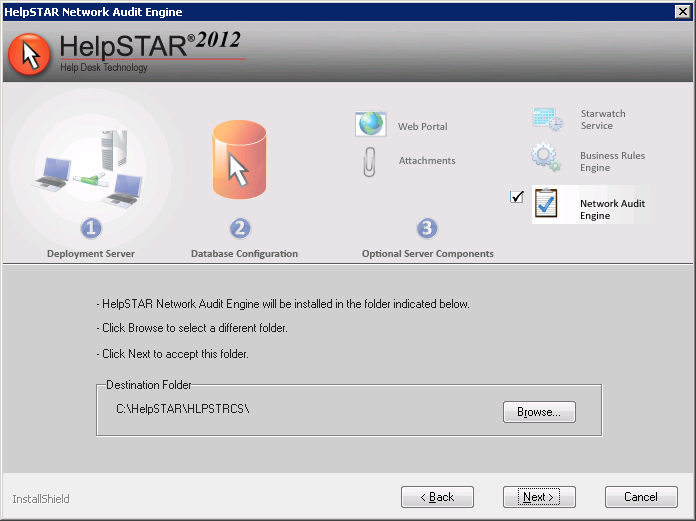
Specify the location in which Network Audit Engine files will reside.
A default location will be provided (C:\HelpSTAR\HLPSTRCS). The location
can be altered by clicking on the Browse button. In the location
specified, the subfolder \Modules\AuditService will be created. Click
Next.
-
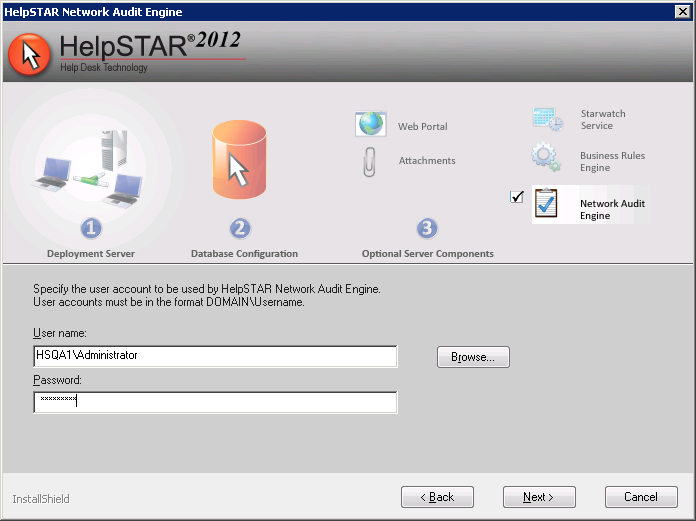
You will be prompted to specify the domain account that this service will
be run under.
-
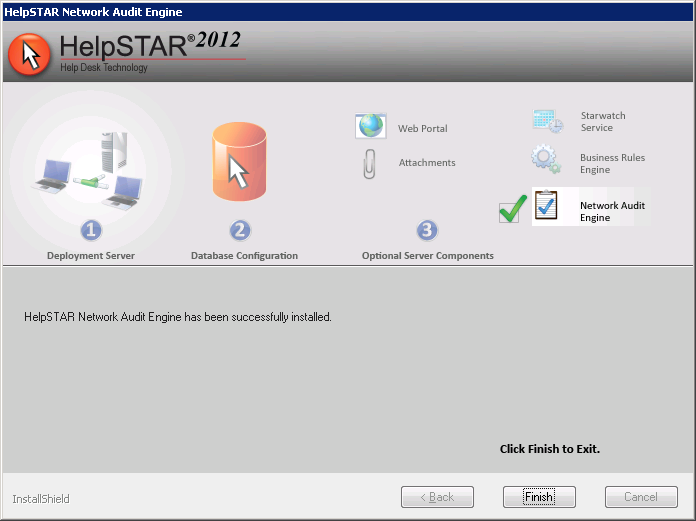
A confirmation will appear upon successful completion of the Network Audit
Engine installation.
Client Audit Add-In Installation & Configuration
Prerequisites:
In order for the Client Audit Add-In to perform on each of the workstations
in which it is installed, the following prerequisites must be met:
-
The HelpSTAR Audit Service must be installed on the Deployment Server.
-
The user logged into the workstation must have local administrator rights
on the machine and must be able to connect directly with the HelpSTAR
database.
Notes:
-
The Client Audit Add-In service does not have to be installed on the
machine hosting the HelpSTAR Audit Engine Service.
-
In order for the Client Audit Add-In to perform at scheduled intervals, a
discovery schedule must be configured.
-
On the machine in which the Client Audit Add-In service will be installed,
navigate to the following location on the HelpSTAR Deployment server:
\HelpSTAR\HLPSTRCS\Install\
-
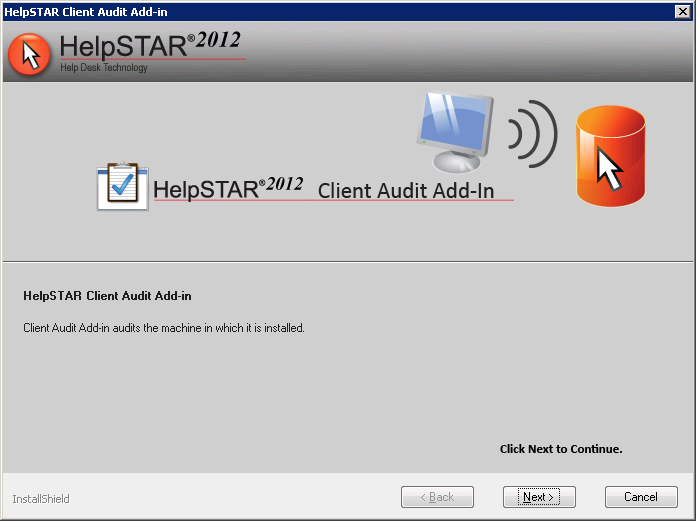
Launch the file hsauditclientcs.exe. Click Next when
prompted.
-
-
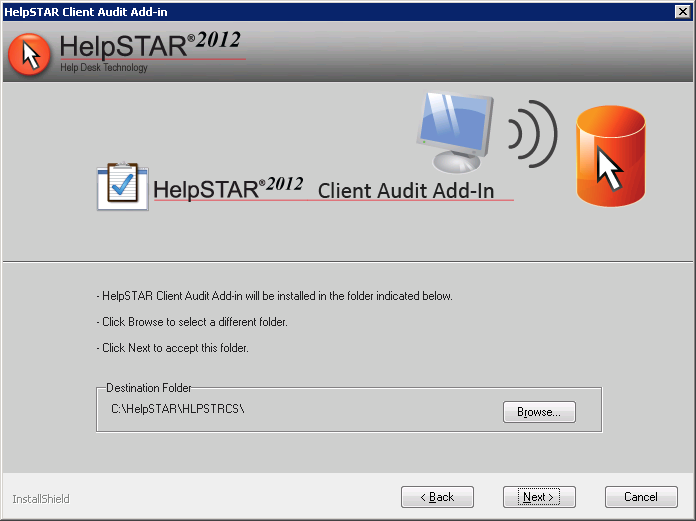
Specify the location in which the Client Audit Add-In files will
reside. A default location will be specified
(C:\HelpSTAR\HLPSTRCS). The location can be altered by clicking on the
Browse button. Click Next when complete.
-
-
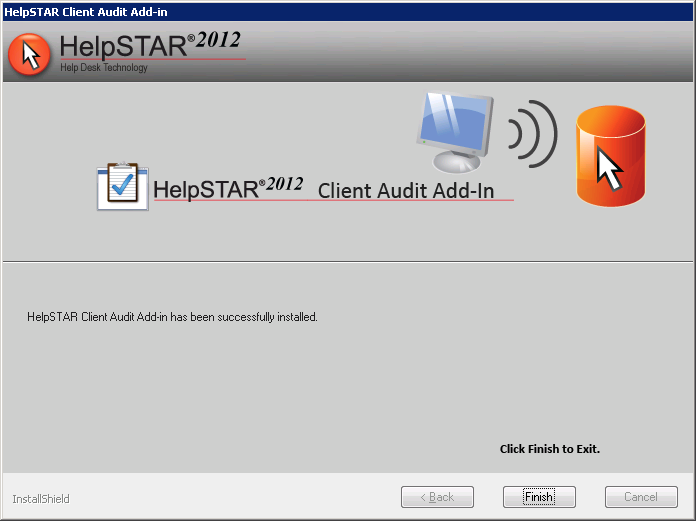
A confirmation prompt will appear upon successful completion of the Client
Audit Add-In Installation.
-
-
Once installed the service must be started in order for the add-in to audit
at a configured schedule. This can be found in the services consoles as
shown below:
-

Part 6 – HelpSTARWeb Components
HelpSTAR is equipped with several web components that your users can access
to submit and service requests.
Notes Regarding Web Components Installation:
-
The Web Components Installer will only allow you to use a single web site
for these components. Individual portals must be installed as virtual
directories to this web site.
-
If you wish to install the components to their own individual websites,
uncheck these components in this step. Then at a later point, launch the
individual web components installers from the following location:
[HelpSTAR
installation directory]\HLPSTRCS\INSTALL
Web
Portal: WebPortalCS.exe
Password
Reset Utility: HSpwdReset.exe
SharePoint
Portal: HSSPWebPortal.exe
Mobile
Web Portal: HSMobileWeb.exe
-
On the server in which you want to install the HelpSTAR Web Components,
navigate to the HelpSTAR Deployment Server folder
(\HelpSTAR\HLPSTRCS\Install).
-
Click on the “HSWebIntegrate.exe”
file. The Web Portal Components installation will
proceed. Click Next to begin the installation.

-
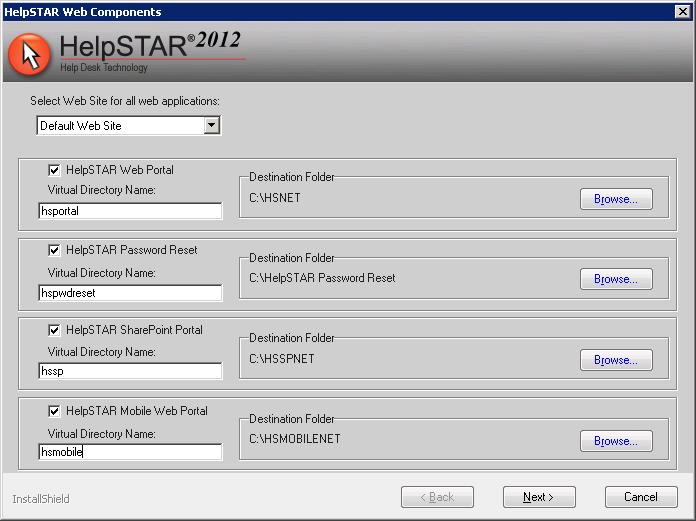
The Web Components installer will let you decide
what components will be installed. On the server, determine which IIS
Web Site will be used. For each component selected, provide an IIS
Virtual Directory and Destination Folder for the installation. Once you
have chosen which components will be installed, click on Next to
proceed.
-
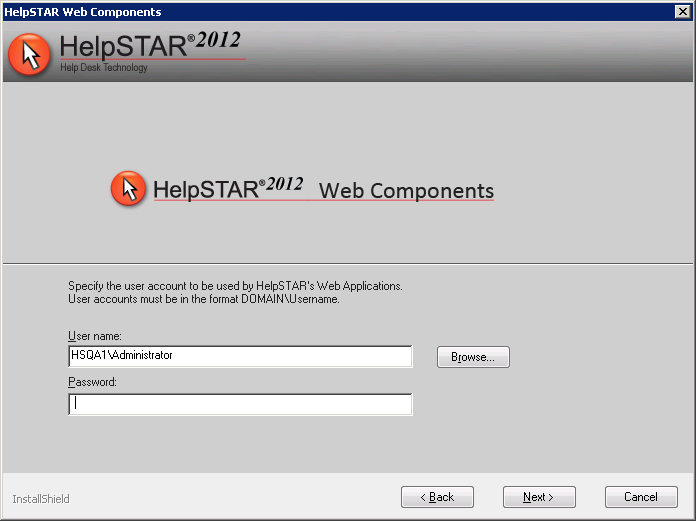
For all web components, specify a Domain User and
Password to be used for authentication. If you have selected the
Password Reset component, you will also need to Delegate the “Reset users
passwords and force password change at next logon” control to this user in
Active Directory. Click on Next to proceed.
HelpSTAR .Net Web Portal Installation
Web Portal Installation Prerequisites:
-
Microsoft .Net Framework 3.5 is required for this installation.
-
Internet Information Services 6.0 or 7.0 must be installed prior to running
this installation.
-
A domain user account will be required during installation. Ensure
that the domain user account has a password that does not expire.
Note:
Instructions provided below presume that the web server and the database
server reside on the same domain.
Web Portal Installation:
-
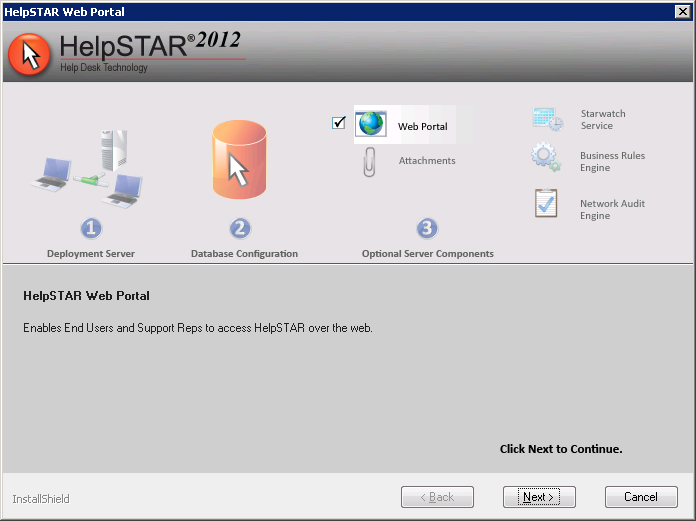
If you have selected to install the Web portal, the Web Portal installer
will launch.
-
-
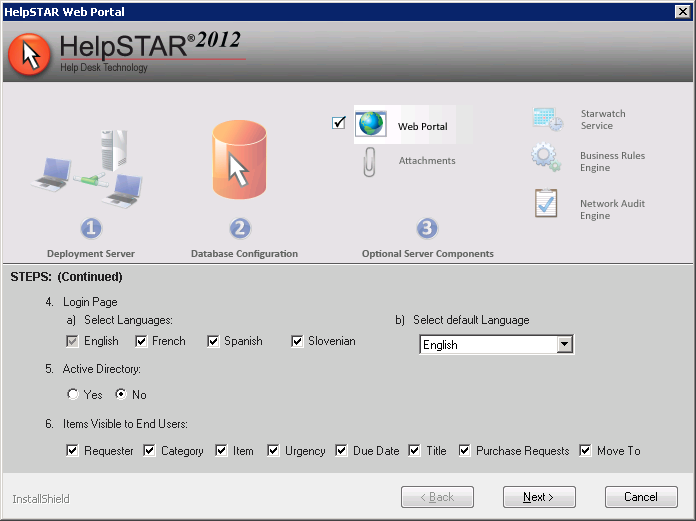
On this screen, you will be prompted to select the following options:
-
-
Login Page Language
a) Select the languages that should be made available to the users of the
Web portal.
b) Select the default language presented to the end users on the Web
portal.
-
Active Directory - If users have been imported from Active
Directory, selecting this option allows you to set a login bypass for the
Web interface. This allows a user to automatically login into the Web
portal interface using the same login used for the machine they are
currently logged in to.
-
Items Visible to End Users - specify the fields available to end
users when logging a new request.
-
-
Click Next when finished with the above options.
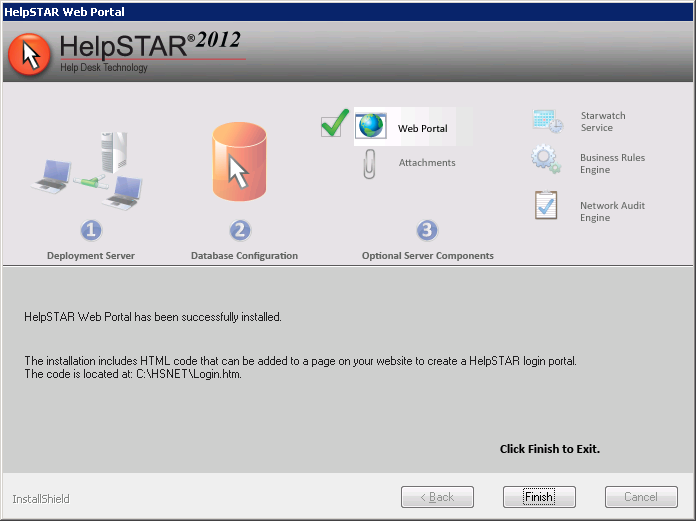
A confirmation will appear upon successful completion of the HelpSTAR Web
Portal installation.
-
-
Web Portal Customization
HelpSTAR will allow you to customize the look and feel of your .Net Web
Interface. Once the Web Portal installation is complete, options to
customize the Web Portal will be launched (as shown below).
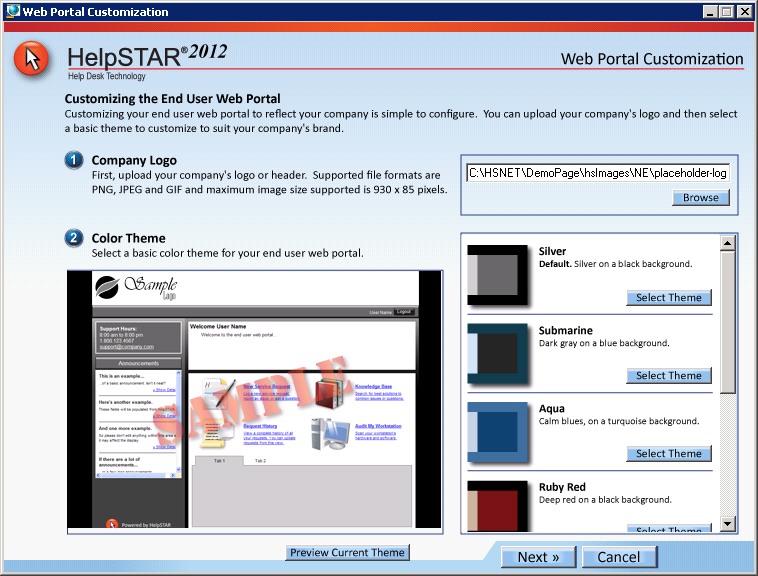
You can complete your customizations at this stage. However, should you
decide to customize or modify the theme of your web portal at a later time, you
can launch the customization options from the following location:
\HSNET\WebUIThemeCustomize.exe
Note: For Internet Explorer, it is recommended to upgrade version 7.0 or
higher to view the best quality of your customizations.
To complete your customizations, perform the following:
-
Company Logo - Upload your company logo to your Web Portal.
Click on the Browse button to locate your image file. Click on
the Open to insert the image. Note: this image must not exceed
930 x 85 pixels.

-
Color Theme - Select a basic color theme to match your company
logo. Scroll through available options and click on the Select
Theme button for your desired theme.
-
Preview Current Theme - Select the Preview Current Theme
button to view how your theme will appear on the Web Portal. Click
on the Return to Customization Options button to return to the
customization options.

Once you have returned back to the customization options, click on Next
to continue with available options.
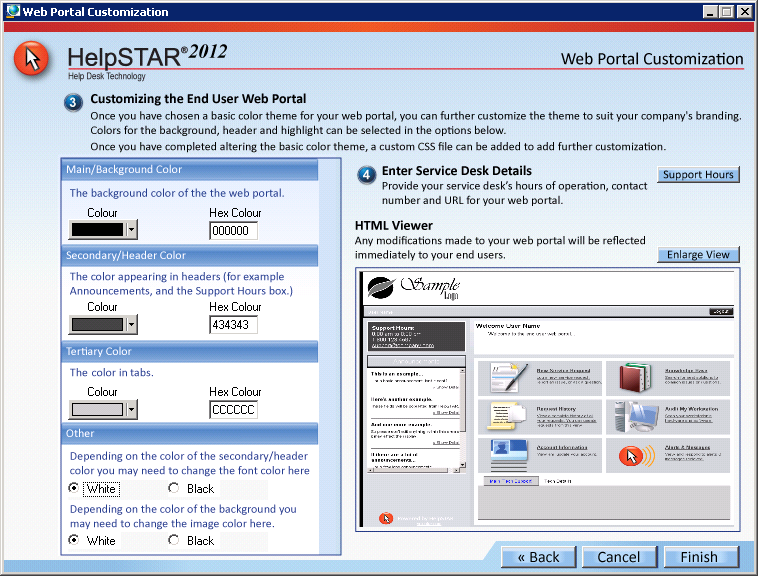
-
Advanced Color Options - Further customization options for the
main/background color of your web portal can be performed at this step.
Select advanced colors to further match your company theme or logo.

-
Service Desk Details - Click on the Support Hours button to
enter the available hours of support, contact phone number and URL for the
help desk.

HTML Viewer - Modifications made to your Web Portal will be reflected
immediately. This viewer will allow you to preview the options selected
for your customization. Click on Enlarge View to preview your Web
Portal on a larger window.
Click on Finish to exit the designer.
HelpSTAR Password Reset Installation
-
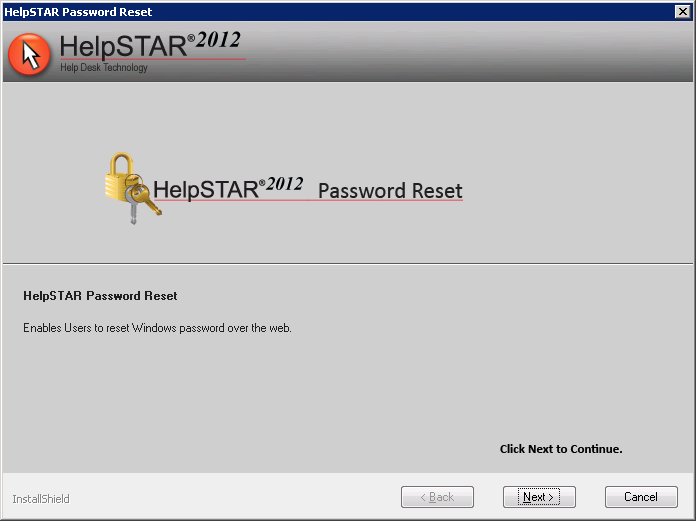
If selected, the Password Reset Installation will
proceed, click on Next to proceed.
-
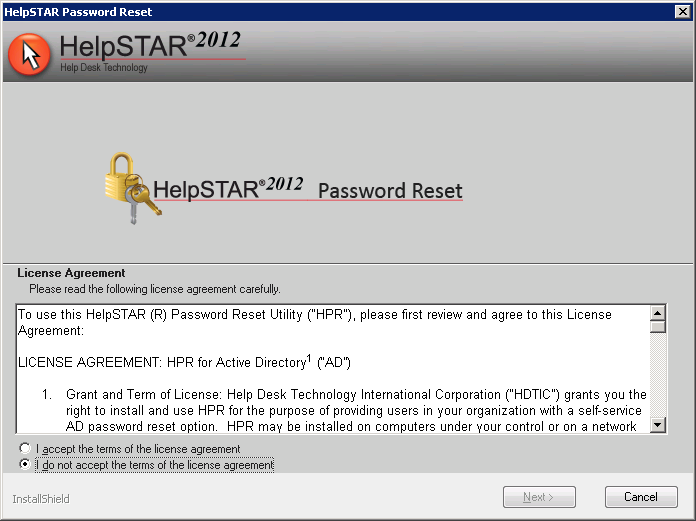
When prompted, review and agree to the
HelpSTAR®2012 license agreement. Click
Next.
-
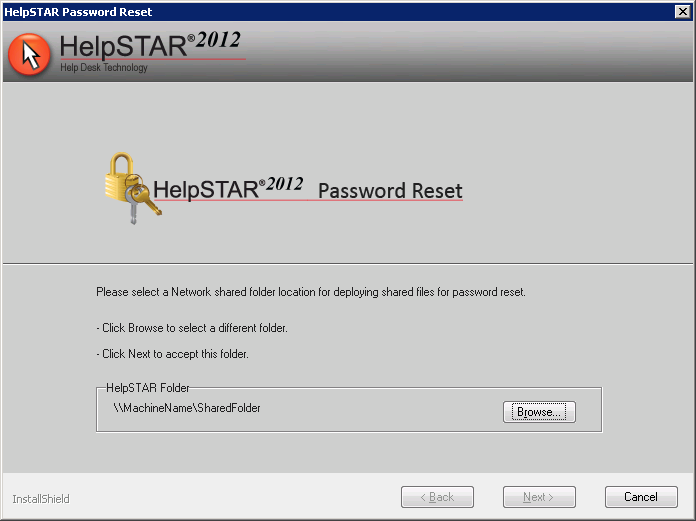
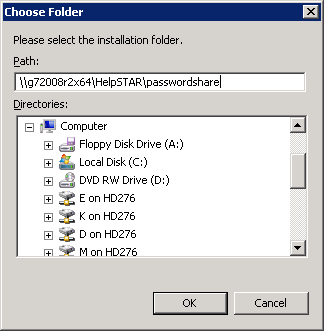
You will be prompted to choose a Shared Folder for
the Password Reset module.
-
When you click Browse, a window will appear which
will allow you to select a folder or enter a network path. Click OK
and then Next to proceed.
-
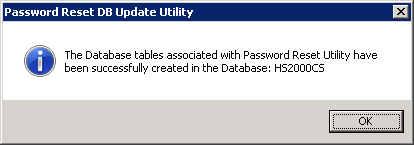
The necessary database tables will be created for
the Password Reset component and a dialog will appear when it has been
completed.
-
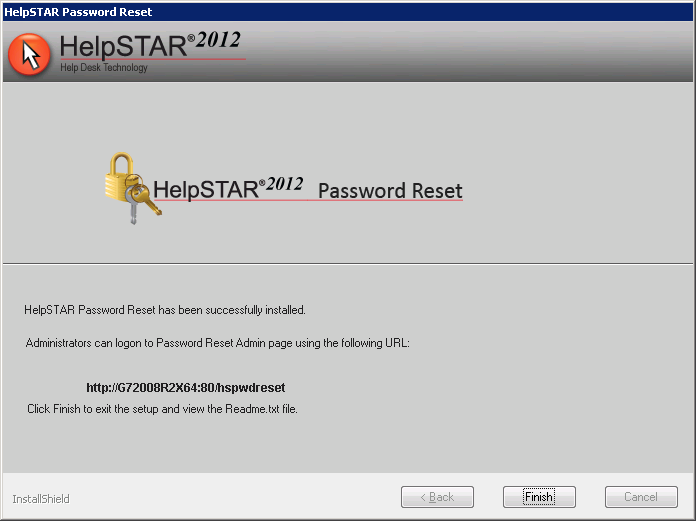
A confirmation will appear upon successful
completion of the HelpSTAR Password Reset installation. The confirmation
will also provide web path for the Administration of this component.
Click on Finish to proceed to the next HelpSTAR component.
HelpSTAR SharePoint Portal Installation
-
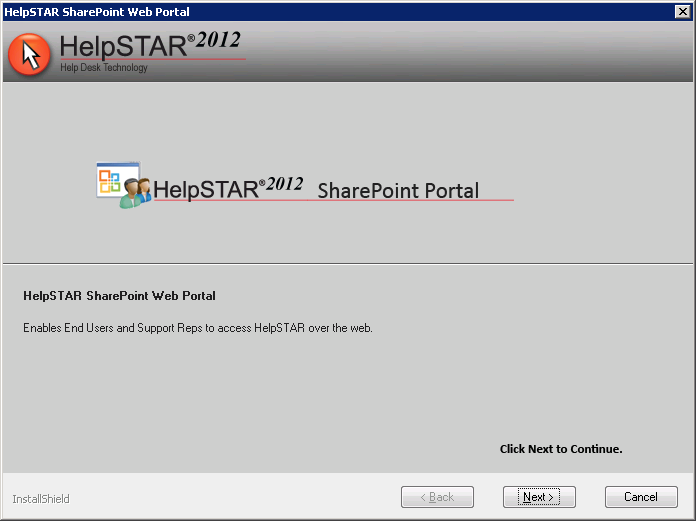
If selected, the SharePoint Portal Installation will
proceed, click on Next to proceed.
-
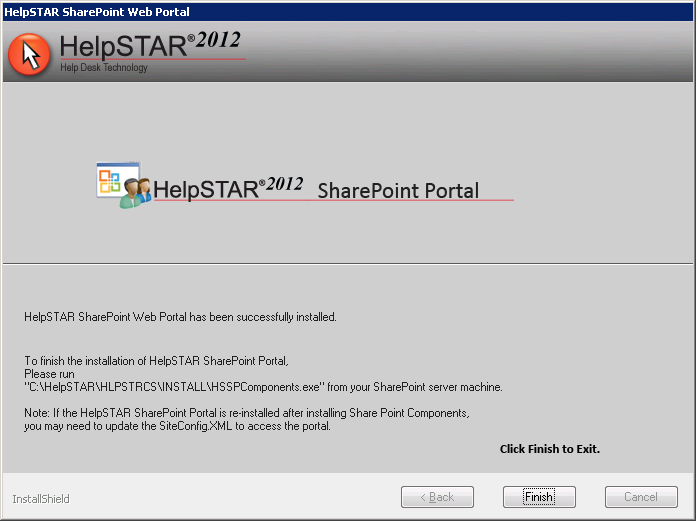
A confirmation will appear upon successful
completion of the SharePoint Portal installation. Click on Finish
to proceed to the next HelpSTAR component.
HelpSTAR Mobile Web Portal Installation
-
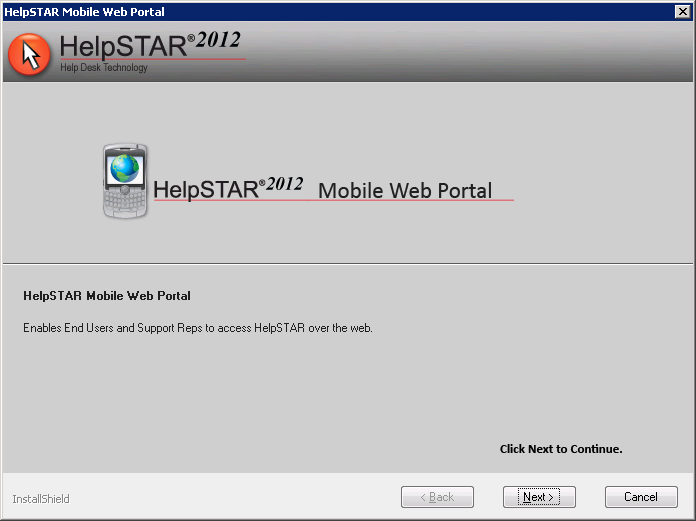
If selected, the Mobile Web Portal Installation will
proceed, click on Next to proceed.
-
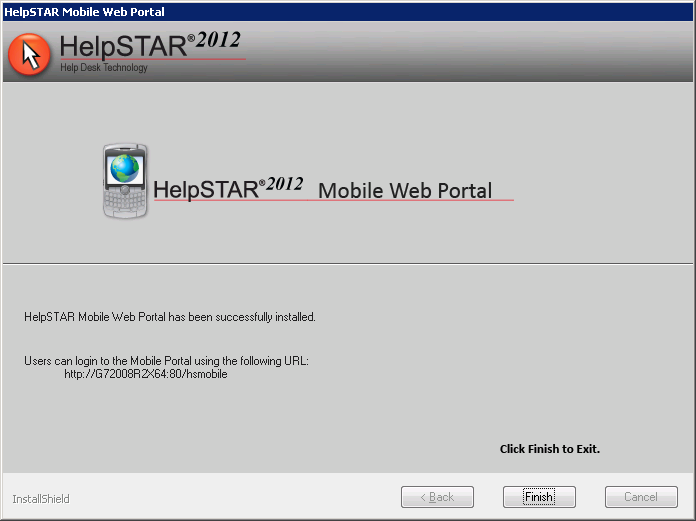
A confirmation will appear upon successful
completion of the Mobile Web Portal Installation. Click on Finish
to proceed to the next HelpSTAR component.
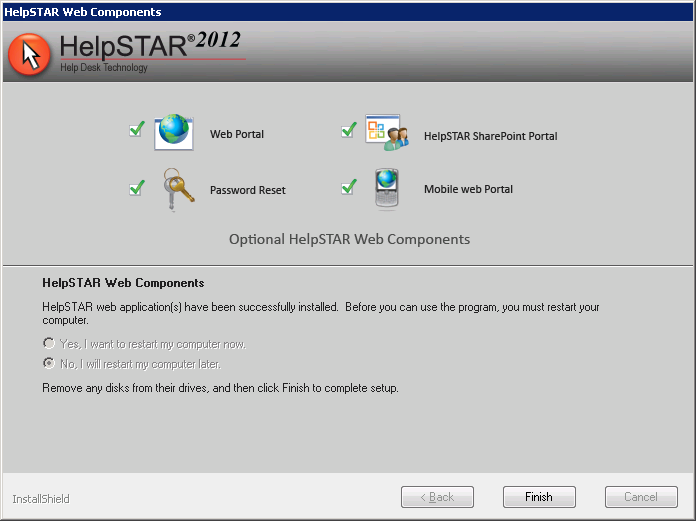
Upon the completion of the component installations, a final confirmation will
be shown.
-
Part 7–Windows Client Installation
(Workstation)
Once the HelpSTAR application has been installed on the deployment server,
you may proceed to install the Windows Client on other workstations.
Windows Client Installation Prerequisites:
-
Windows Installer must be updated to Version 4.5 prior to installing the
Windows Client. It is recommended to perform this installation prior to
attempting the Windows Client installation on a workstation at this requires a
reboot of the machine. For more information, visit the link below:
http://support.microsoft.com/kb/942288
-
The file location of the Windows Client installer must be shared in order
for it to be accessible on other workstations besides the deployment
server.
Sharing the Windows Client Installer Location:
-
On the HelpSTAR Deployment Server, navigate to the \HelpSTAR folder.
-
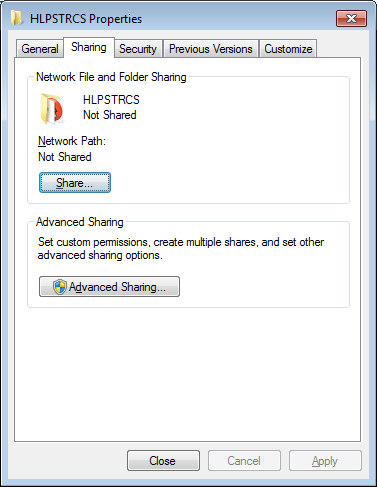
In this folder, right click on the HLPSTRCS folder and select
Properties.

-
In the Properties window, click on the Sharing tab. On the Sharing
tab, click on the Share button.
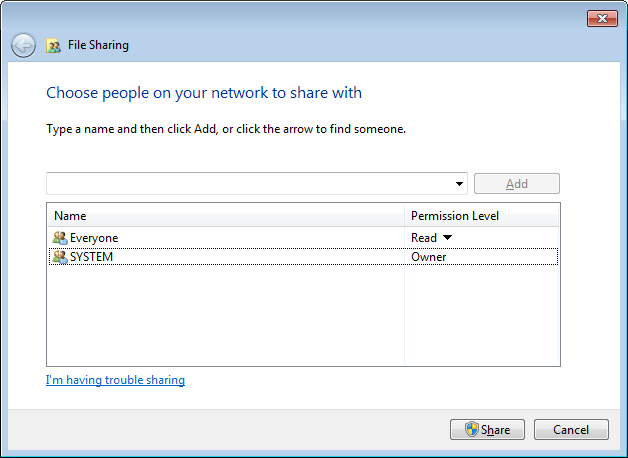
Once the File Sharing window is opened, add everyone or the specific users
you would like to install the Windows Client. Click on the Share
button when complete.
-
-
-
-
-
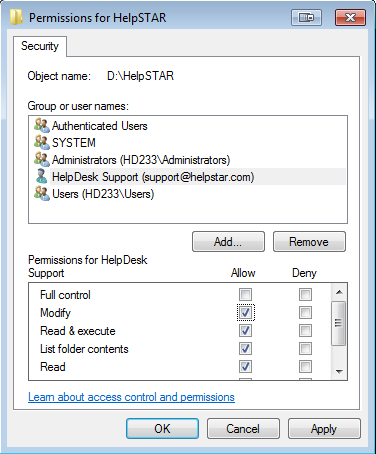
On the Properties window, select the Security Tab. Select the group
of users selected in the latter step and ensure that Modify and Read &
Execute Permissions are applied to this group.
-
When complete, click on Apply to exit this window.
Windows Client Installation:
-
On workstation you wish to install the Windows
Client, navigate to the following location on the HelpSTAR deployment
server and launch the Windows Client Installer:
\HelpSTAR\HLPSTRCS\Install\hswinnetcs.exe
-
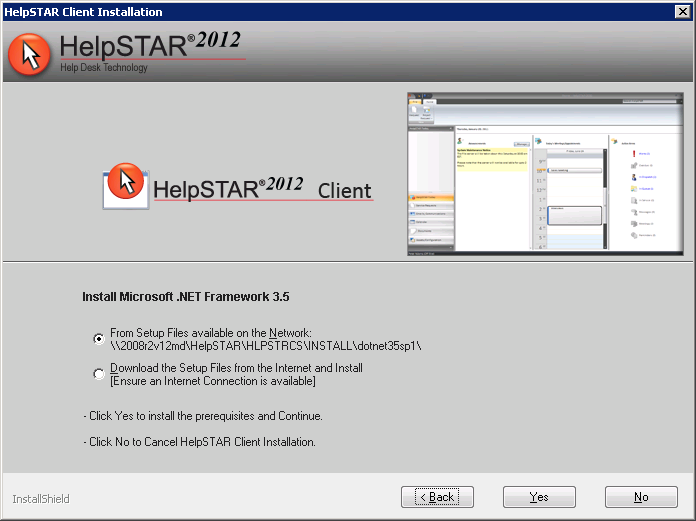
Specify if Microsoft .Net Framework 3.5 setup files should be used from a
location on the network or downloaded from the Internet. Click
Yes to proceed with the framework installation.
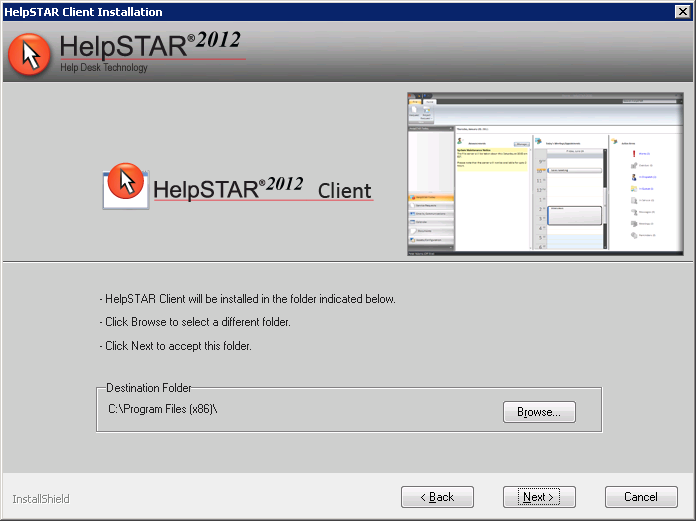
-
Specify the location in which HelpSTAR2012client files
will reside. A default location will be provided (C:\Program
Files\). This can be altered by clicking on the Browse
button. Click Next.
-
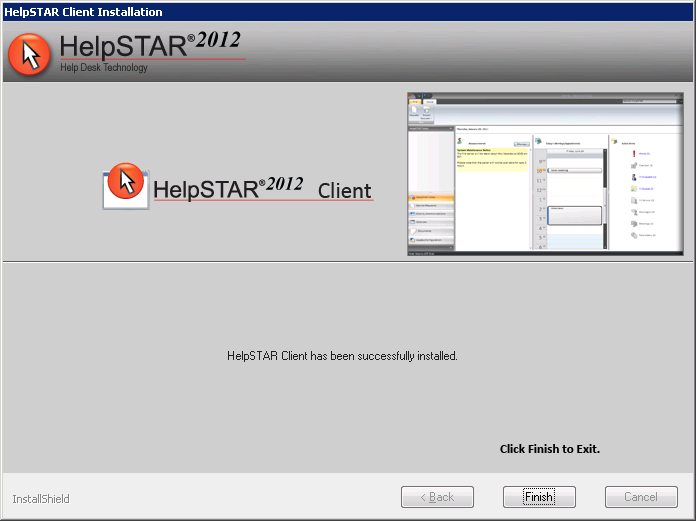
A confirmation will appear upon successful completion of the Windows Client
installation.
Part 8– Importing Users from Active Directory
If your organization has implemented Active Directory Services, HelpSTAR can
be configured to import groups of users and related fields from Active
Directory.
Active Directory Tips
-
Prior to starting the Active Directory import, determine how users should
be imported from Active Directory. For example, determine if users
should be split into teams or OUs based on their Organizational Units or if
they should be imported to a main OU for now.
-
A unique identifier is the field that HelpSTAR will look for when importing
distinct users. Select a unique identifier that will have unique values
in Active Directory. For example, “name” or “email” would be good fields
in which to import users as these fields are rarely duplicated.
Import Settings:
-
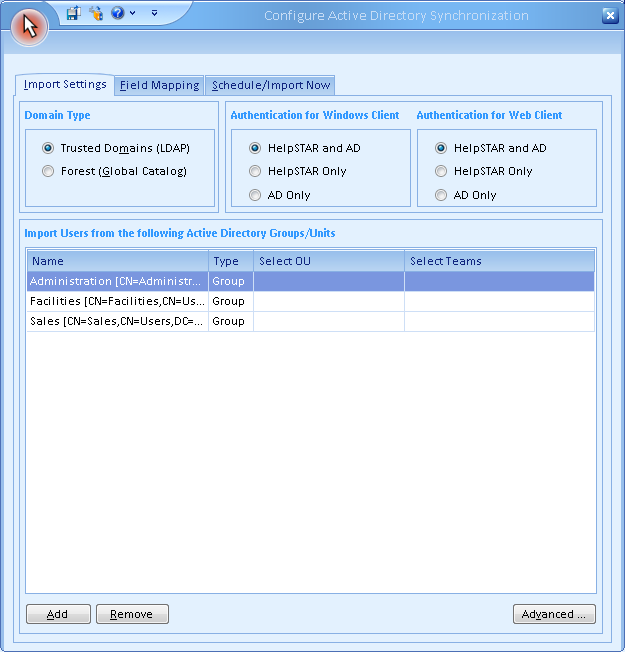
In HelpSTAR, click on Active Directory Sync icon on the HelpSTAR
Customization Tab. The following screen will appear:
-
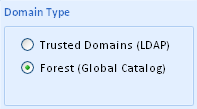
Select the Domain Type: Trusted Domain (LDAP) or Forest (Global
Catalog).
-
Select how you would like users to login to HelpSTAR. Note that if
Active Directory authentication is selected, HelpSTAR will automatically log
the user in as the user they have logged into the workstation as.

-
To import from specific Organizational Units or Groups in Active Directory
and import users to Teams based on their OrganizationalUnit, perform the
following:
-
Click on the Edit button in the “Import Users from the following
Active Directory Groups/Unit” section.
-
Your Active Directory Tree Structure will appear. Select the
desired Organizational Units, Groups or Containers and then click
OK.

-
Once a specific OrganizationalUnit has been selected, you can select a
specific Team to import users to. Double click on the blank Select
Team field next to the Organizational Unit added. Options
available are:
-
Create a New Team (based on the Organizational Unit name)
-
Select a previously added Team in HelpSTAR.

Field Mappings:
If you want to import data regarding users other than name into
HelpSTAR, perform the following:
-
Click on the Field Mapping tab. The following screen will
appear:

-
Click on Add button in the “Map ADS fields to HelpSTAR User Fields”
section. The following prompt will appear:

-
Select the field to be filled infrom the HelpSTAR drop-down box.
-
Select the field to be imported from Active Directory in the ADS drop-down
box.
-
Click OK when complete.
-
Add additional fields if necessary.
-
In the “Default Organizational Unit” section, select a OUthat users will be
associated with if their department field in Active Directory is not
populated.

Schedule/Import Now
To import users immediately or to configure a scheduled interval to import
users, select the Scheduled/Import Now tab. The following screen will
appear:

To import users immediately, click on the Import Now button as shown
below:

At this point, your users will be imported into HelpSTAR. Prompts will
appear to update you the status of the import. Once users have been
imported, you will receive a confirmation prompt.
To schedule a regular interval in which users should be imported, configure a
desired schedule in the Import Schedule section as shown below:

Part 9–SystemEmail Configuration
System Email allows HelpSTAR to process incoming email requests, send reply
messages, notify requesters of updates to their open requests and send outgoing
request details. You can add multiple email accounts so that users can
submit requests to different addresses. For example, all email received by
your helpdesk, itsupport@yourorganization.com, will be processed by
HelpSTAR.
System Email Prerequisites:
MAPI
-
To configure System Email, you must be logged into the machine with the
HelpSTAR StarWatch service installed as the user attached to the mailbox.
-
The user attached to the mailbox must be a local administrator for the
machine where StarWatch is installed.
GroupWise
-
Outlook and an Outlook connector for GroupWisemust be installed and
configured on the machine where the HelpSTAR StarWatch Service is
installed.
-
A password must be set for the mailbox in GroupWise and must be stored in
aGroupWise profile. Upon launching Outlook, you will not be prompted for
a password if a password has been configured correctly in a GroupWise profile.
-
System Email settings for the GroupWise should be configured using the same
user account that is given the “run as” privileges for the HelpSTAR StarWatch
service.
Lotus Notes (IMAP)
-
Lotus Notes should be configured to allow either anIMAP or POP3 connection
from the server where the HelpSTAR StarWatch service is installed.
-
IMAP or POP3 must be enabled on the mail server.
-
Lotus Notes must be configured to allow SMTP connections for sending
outgoing mail from HelpSTAR.
-
System Email settings for Lotus Notes should be configured using the same
user account that is given the “run as” privileges for the HelpSTAR StarWatch
service.
System Email for SMTP/POP3
-
Open the server’s Services console (Start > Run > Type in
Services.msc> Press Enter).
-
Stop the HelpSTAR StarWatch Service.
-
In HelpSTAR, click on System Email Account on the HelpSTAR
Customization tab. The following window will appear:

-
Click on the Add button to add a mail account used for System
Email. The following window will appear:

-
Select the POP3/SMTP option in the Mail Server Type section.
-
In the Account Information section, enter the settings for the mail
account.
-
Using the Dispatch Folder button, select a default location for requests
submitted to this email address.
-
In the Server Information section, enter in the details for the mail
server. If your mail server employs SSL authentication, check the
Enable SSL option when entering the POP3 and SMTP servers.

-
In the Properties section, the following options are available:
-
Option to process emails from users that have email disabled in their
user properties.
-
Find user options - link an email to a service request via email address,
then display name or vice versa.
-
If you want a copy of failed messages be sent to you or another user;
enter an email address for notifications.
-
Create text log files for incoming and outgoing emails.
-
To ensure settings are correct, click on Test Account
Settings. If successfully connected, a prompt will appear saying
“Successfully Connected to Mail Account”.

-
When settings have been entered and verified, click on Save to save
settings and exit this window. You will return to the original
window.
-
In the “System Account Monitoring Status”section, check Enable to
start System Email.

-
In the “Scanning Interval & Alert” section, specify the time interval
in which System Email should scan for incoming emails.

-
Click on Finish to save settings.
-
Return to your Services console and start the HelpSTAR StarWatch
Service.
System Email for MAPI
-
Open the server’s Services console (Start > Run > Type in
Services.msc> Press Enter).
-
Stop the HelpSTAR StarWatch Service.
-
In HelpSTAR, click on System Email Account on the HelpSTAR
Customization tab. The following window will appear:

-
Click on the Add button to add a mail account used for System
Email. The following window will appear:

-
Select the MAPI option in the Mail Server Type section.
-
In the Account Information section, enter the settings for the mail
account.
-
Using the Dispatch Folder button, select a default location for requests
submitted to this email address.
-
In the Server Information section, enter in the details for the mail
server.
-
In the Properties section, the following options are available:
-
Option to process emails from users that have email disabled in their
user properties.
-
Find user options - link an email to a service request via email address,
then display name or vice versa.
-
If you want a copy of failed messages be sent to you or another user;
enter an email address for notifications.
-
Create text log files for incoming and outgoing emails.
-
To ensure settings are correct, click on Test Account
Settings. If successfully connected, a prompt will appear saying
“Successfully Connected to Mail Account”.

-
When settings have been entered and verified, click on Save to save
settings and exit this window. You will return to the original
window.
-
In the “System Account Monitoring Status”section, check Enable to
start System Email.

-
In the “Scanning Interval & Alert” section, specify the time interval
in which System Email should scan for incoming emails.

-
Click on Finish to save settings.
-
Return to your Services console and start the HelpSTAR StarWatch
Service.
System Email using GroupWise
-
Open the server’s Services console (Start > Run > Type in
Services.msc> Press Enter).
-
Stop the HelpSTAR StarWatch Service.
-
In HelpSTAR, click on System Email Account on the HelpSTAR
Customization tab. The following window will appear:

-
Click on the Add button to add a mail account used for System
Email. The following window will appear:

-
Select the GroupWise option in the Mail Server Type section.
-
In the Account Information section, enter the settings for the mail
account.
-
In the Server Information section, enter in the details for the mail
server.
-
In the Properties section, the following options are available:
-
Option to process emails from users that have email disabled in their
user properties.
-
Find user options - link an email to a service request via email address,
then display name or vice versa.
-
If you want a copy of failed messages be sent to you or another user;
enter an email address for notifications.
-
Create text log files for incoming and outgoing emails.
-
To ensure settings are correct, click on Test Account
Settings. If successfully connected, a prompt will appear saying
“Successfully Connected to Mail Account”.
-
When settings have been entered and verified, click on Save to save
settings and exit this window. You will return to the original
window.
-
In the “System Account Monitoring Status”section, check Enable to
start System Email.

-
In the “Scanning Interval & Alert” section, specify the time interval
in which System Email should scan for incoming emails.

-
Click on Finish to save settings.
-
Return to your Services console and start the HelpSTAR StarWatch
Service.
System Email using IMAP/SMTP
-
Open the server’s Services console (Start > Run > Type in
Services.msc> Press Enter).
-
Stop the HelpSTAR StarWatch Service.
-
In HelpSTAR, click on System Email Account on the HelpSTAR
Customization tab. The following window will appear:

-
Click on the Add button to add a mail account used for System
Email. The following window will appear:

-
Select the IMAP/SMTP option in the Mail Server Type section.
-
In the Account Information section, enter the settings for the mail
account.
-
In the Server Information section, enter in the details for the mail
server. If your mail server employs SSL authentication, check the
Enable SSL option when entering the IMAP and SMTP servers.

-
In the Properties section, the following options are available:
-
Option to process emails from users that have email disabled in their
user properties.
-
Find user options - link an email to a service request via email address,
then display name or vice versa.
-
If you want a copy of failed messages be sent to you or another user;
enter an email address for notifications.
-
Create text log files for incoming and outgoing emails.
-
To ensure settings are correct, click on Test Account
Settings. If successfully connected, a prompt will appear saying
“Successfully Connected to Mail Account”.

-
When settings have been entered and verified, click on Save to save
settings and exit this window. You will return to the original
window.
-
In the “System Account Monitoring Status” section, check Enable to
start System Email.

-
In the “Scanning Interval & Alert” section, specify the time interval
in which System Email should scan for incoming emails.

-
Click on Finish to save settings.
-
14. Return to your Services
console and start the HelpSTAR StarWatch Service.
Additional Resources
Technical Specifications:
http://www.helpstar.com/help-desk-resources/helpstar2012-techspecs.asp


