Installing/Uninstalling Client-Side Password Reset Components Through a Group Policy (GPO) |
|
1. Open “Group Policy Management” (this can be found from the Start Menu under “Administrative tools”) |
|
2. Select the Domain or the OU on which you wish to set the group policy (or GPO). |
|
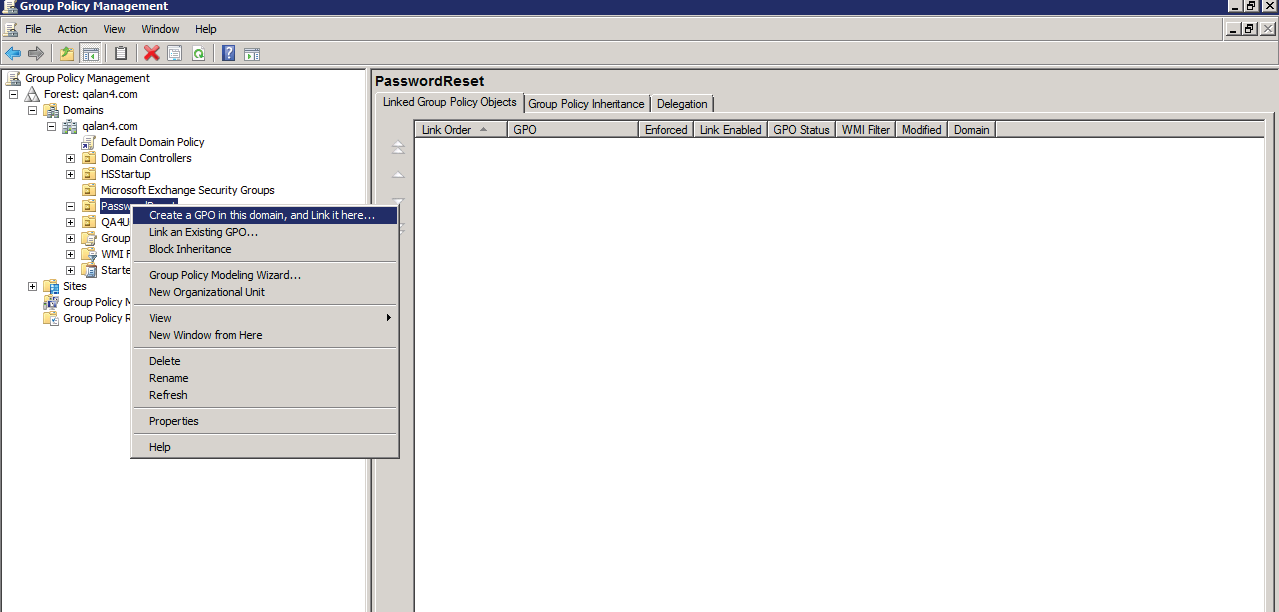
3. Right Click on the domain or OU and select “Create a GPO in this domain, and Link it here…”
|
|
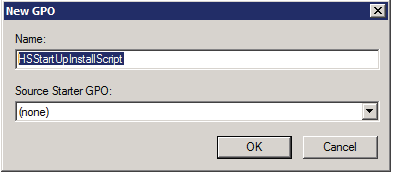
4. On the New GPO form, enter a name for the GPO you wish to create and click the OK button.
|
|
5. Right click on the newly created GPO and click Edit. This will display the Group Policy Editor.
|
|
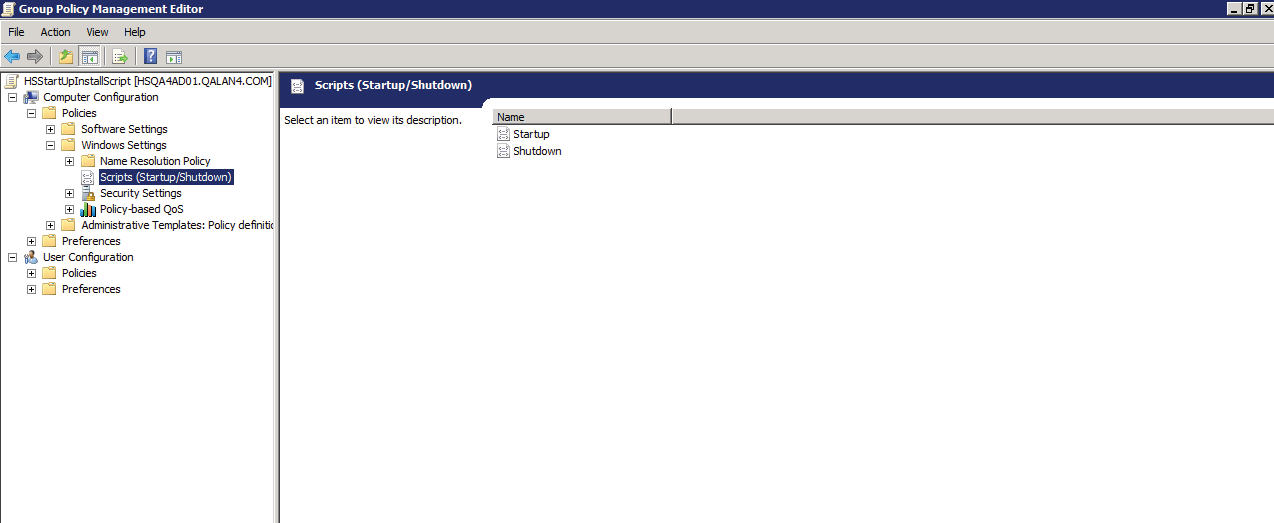
6. Expand “Windows Settings” under “Computer Configuration” and select “Scripts (Startup/ Shutdown)”
|
|
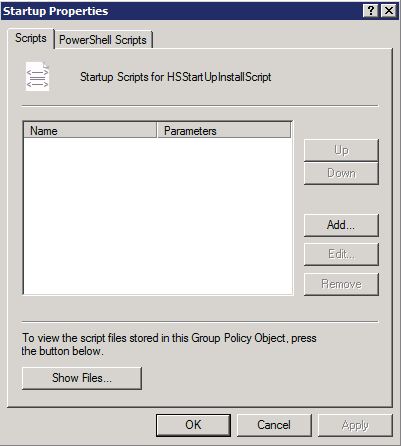
7. With “Scripts” highlighted, double-click on “Startup” from the right pane. This will display the “Startup Properties” window.
|
|
8. On this window, we will add the script file that will be run by the GPO. Click on the Show Files button and copy the “PasswordResetInstallation.vbs” or “PasswordResetUnInstallation.vbs” script into the window that appears and close the window
|
|
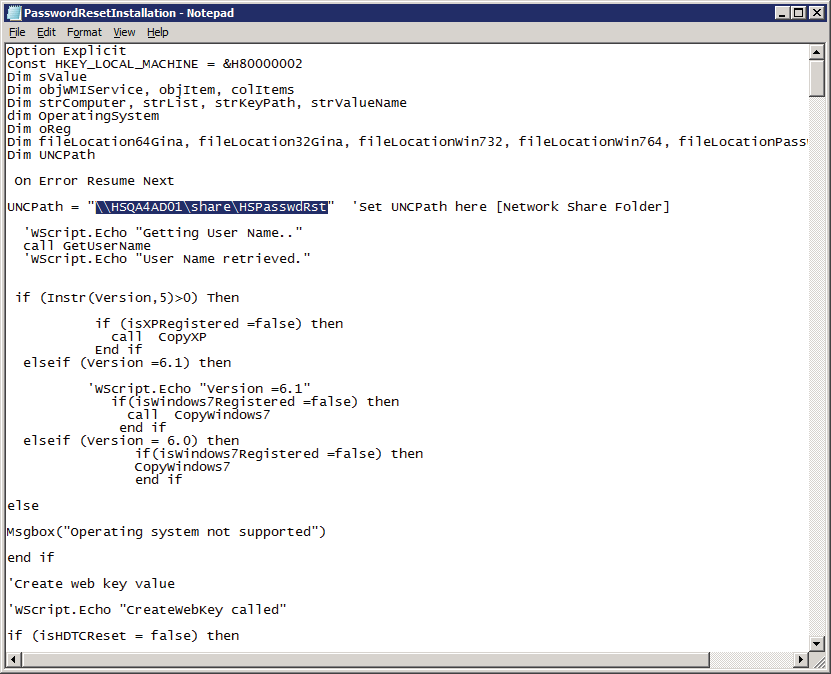
NOTE: The scripts are deployed by the password reset installer under the [INSTALL PATH]\ HSPwdReset\ HSPasswdRst\ folder and are also copied to a shared network location. If the shared network location of the |
|
HSPasswdRst folder is changed, script files will need to be modified. |
|
To do this, open the “PasswordResetInstallation.vbs” or “PasswordResetUnInstallation.vbs” file in any text editor and replace the highlighted area in the following screenshot with the new UNC path. Be sure not to append the end of the path with a slash “\” |
|
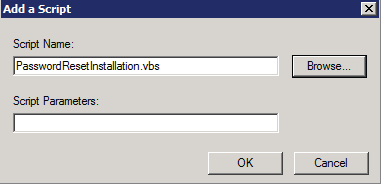
9. With the script now stored in this GPO, click on Add button. |
|
10. Click on the “Browse” button and select the “PasswordResetInstallation.vbs” or “PasswordResetUnInstallation.vbs” file
|
|
Once completed, click OK on the “Add a Script” box and again for the Startup Properties box. |
|
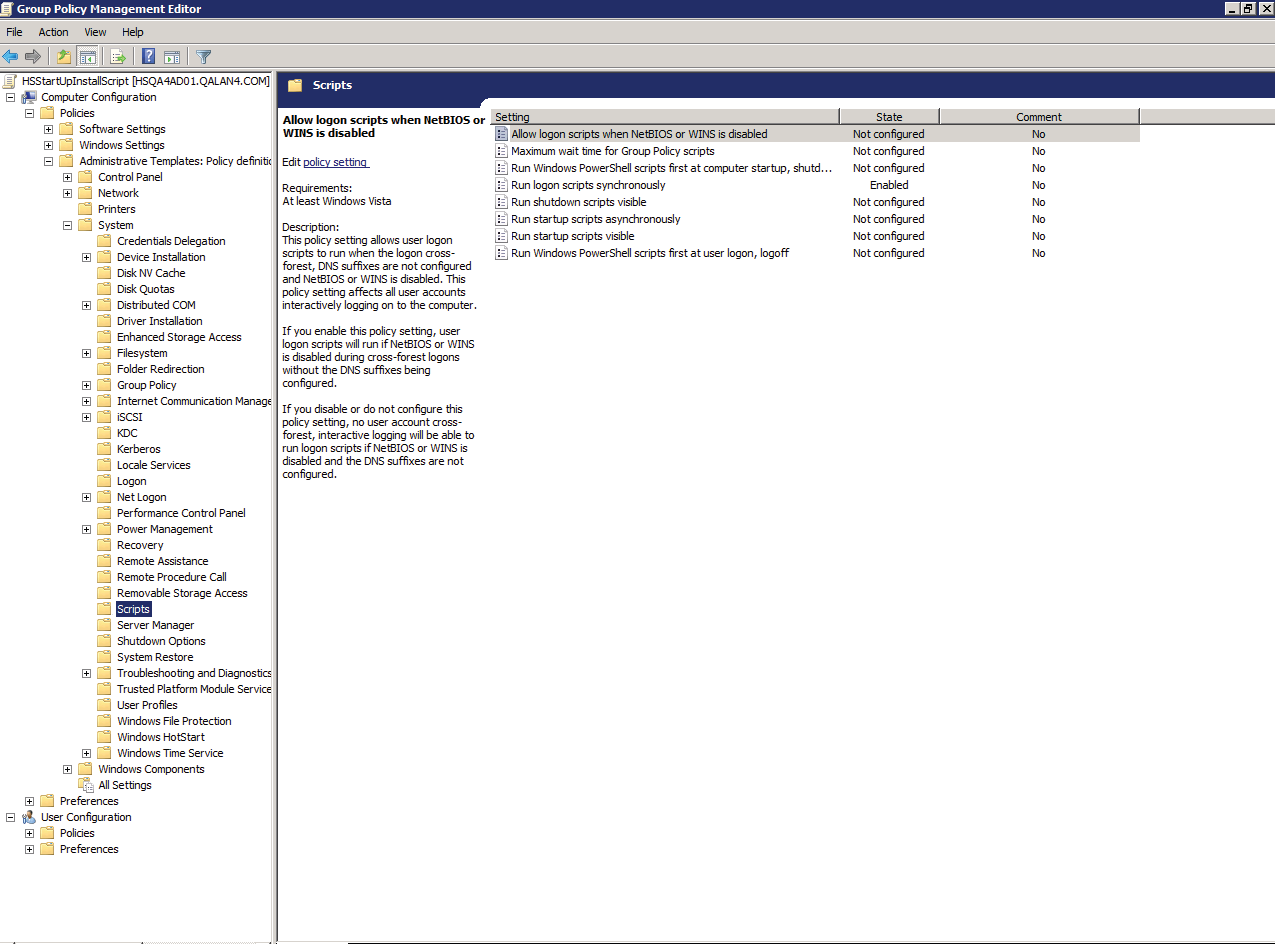
11. With the script added, we’ll next set the administrative template to be used. From the Group Policy Object Editor, Select “Scripts” found under “Computer Configuration > Administrative Templates Policy Definition > System”
|
|
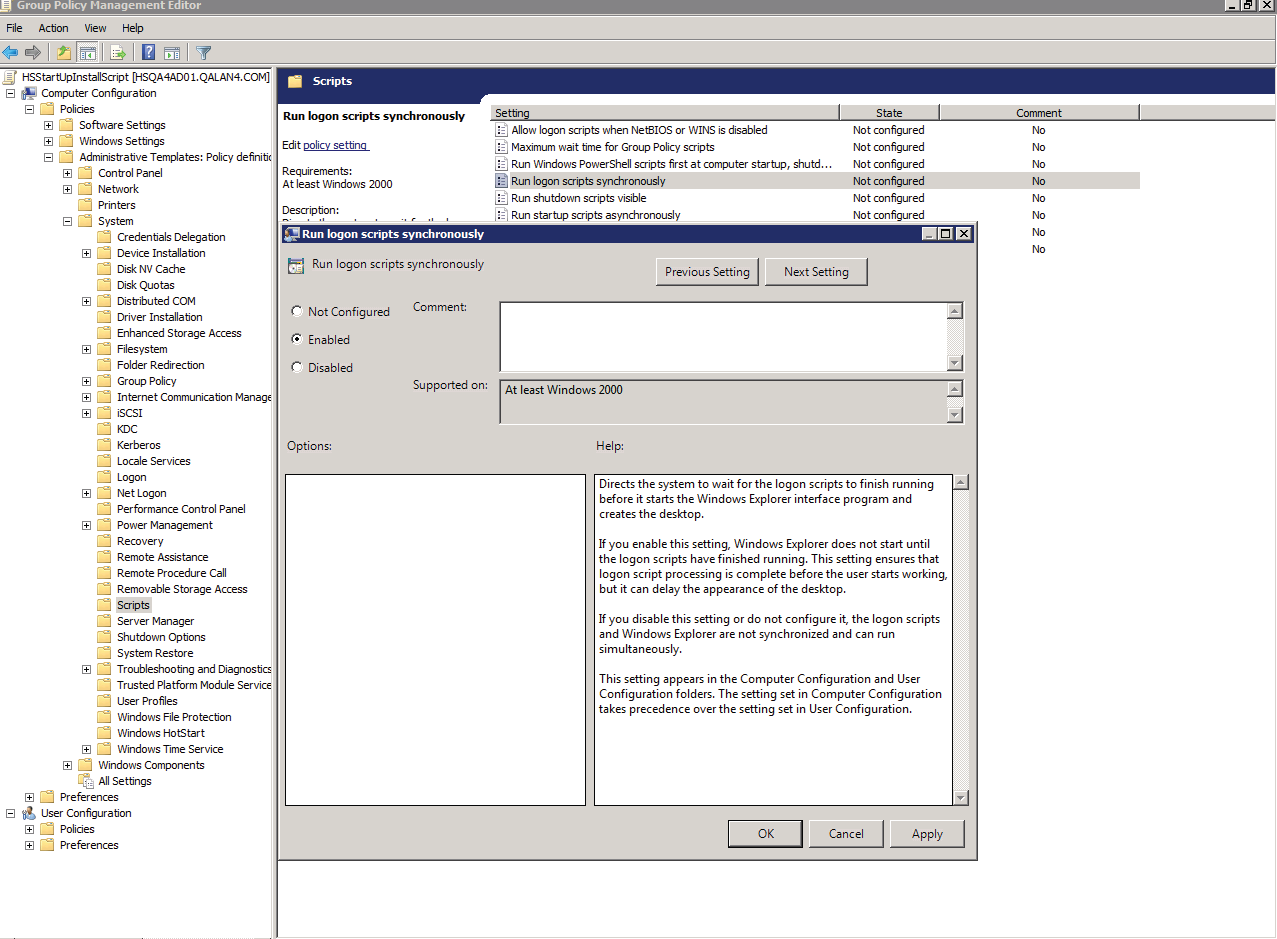
12. Within the right pane, double-click “Run logon scripts synchronously”, select “Enabled”, and click OK
|
|
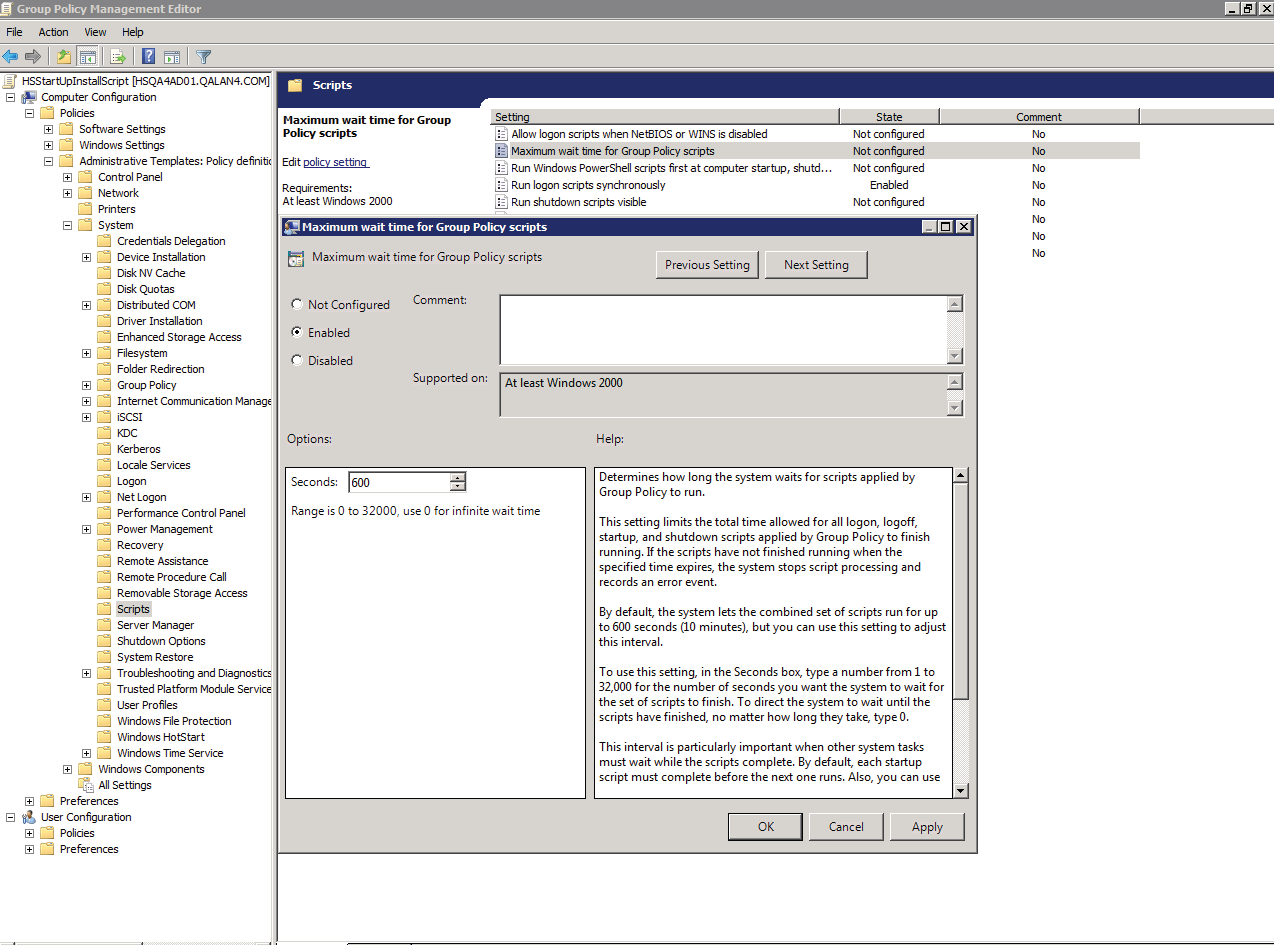
13. With scripts still selected, from the right pane, double-click “Maximum wait time for group policy scripts” , select “Enabled”, and click OK
|
|
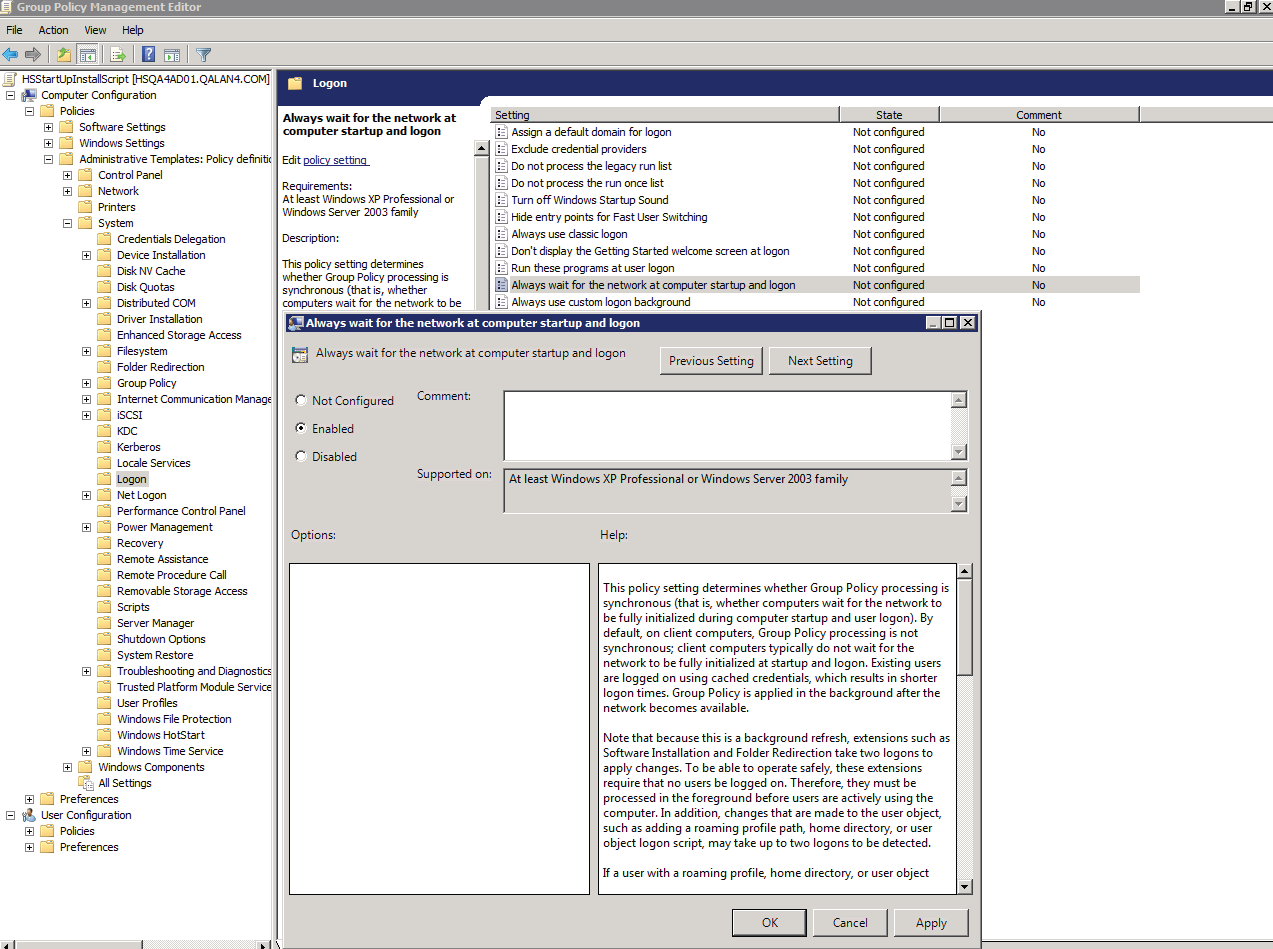
14. With “logon” selected in the left pane, double-click “Always wait for the network at computer startup and logon” within the right pane, select “Enabled”, and click OK
|
|
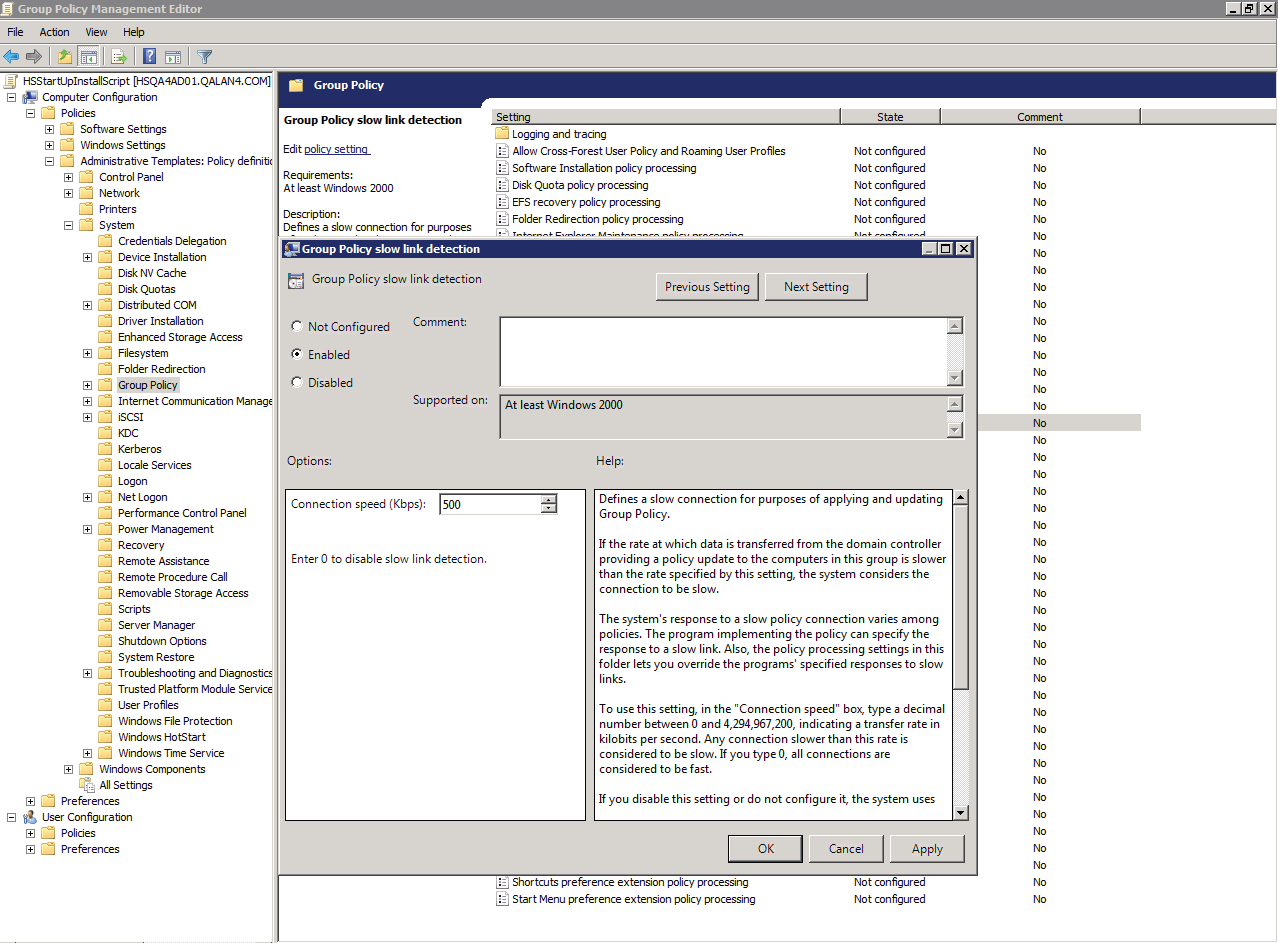
15. With “Group Policy” selected in the left pane, double-click on “Group Policy slow link detection” within the right pane, select “Enabled”, and click OK
|
|
Next, we will apply the policy to computer accounts. To simplify this, it is recommended that all computer accounts be placed in a single group. |
|
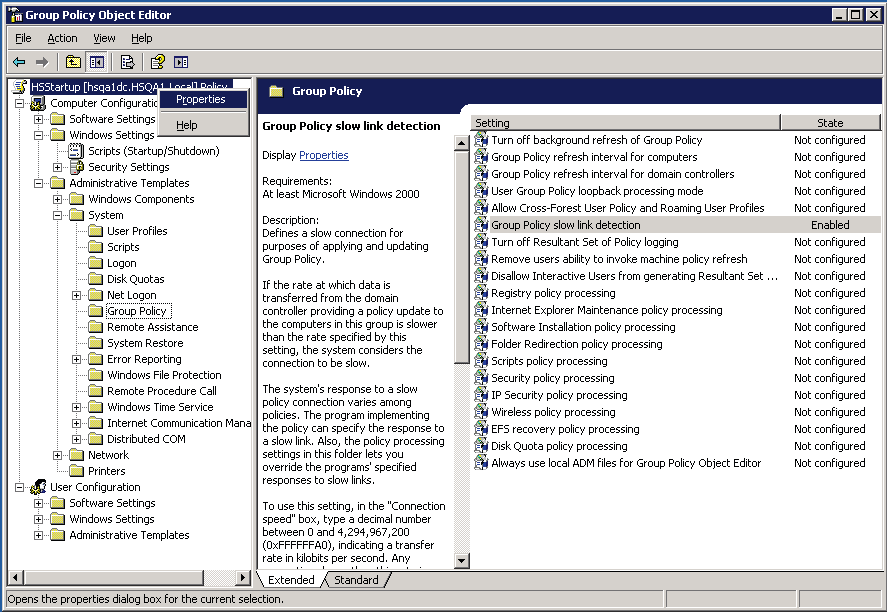
16. Right-click the main GPO node and click on properties
|
|
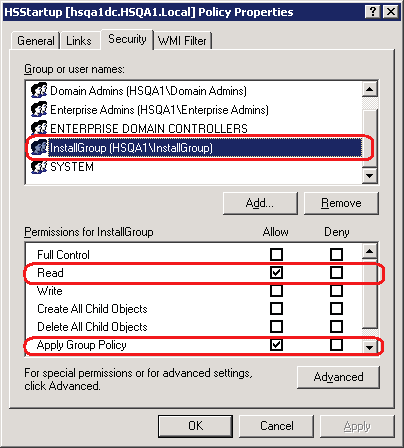
17. From the Security tab, add the computer accounts or the group(s) containing the computer accounts and grant them “Read” and “Apply Group Policy” permissions
|
|
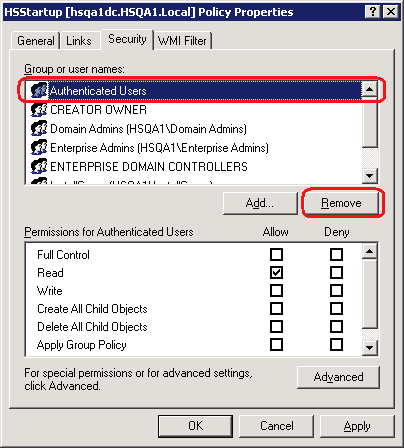
18. Select Authenticated Users group and click Remove
|
|
19. Click Apply and close the windows including the GPO Editor |
|
20. Now reboot all the client machines to execute the new GPO. Note: Refer to http://support.microsoft.com/kb/840669 for Windows XP Sp1 and Sp2. |
.bmp)
