New Asset
Overview:
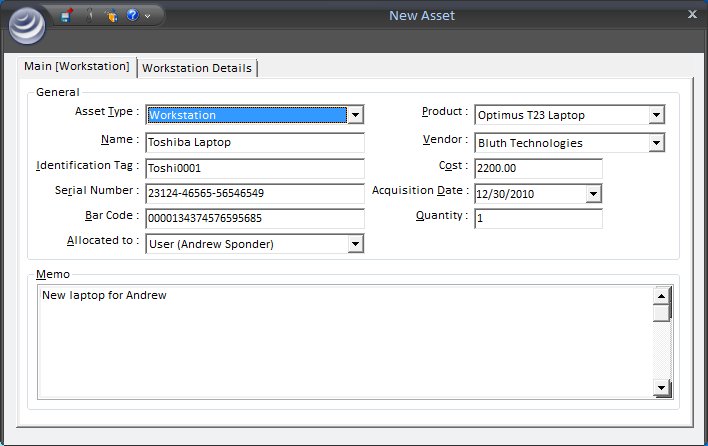
HelpSTAR allows the ability to add and manage assets that can be attached to users or departments. This section allows you to create a new asset. Once created, the asset can be allocated to Inventory, or to a User, Company, or Department using the form shown below.

1. General Information:

- Asset Type: Select the type of product you are adding. By default, the asset type will be “Generic Asset”. Other options available are hardware, software and workstation. If you have created your own custom asset types via User Defined Fields, you will be able to select them from here.
- Name: Enter the name of the Asset you wish to add. This field is the only required field and must be unique.
- Identification Tag: Reference field or code for an asset as set by your organization.
- Serial Number: Enter the serial number of the product which you are adding.
- Bar Code: Enter bar code information for this product.
- Allocated to: Select whether this item will be allocated to an asset, company, department, user, or to inventory.
- Product: Select the product from the drop-down list. If it is not in the listing, there is also an option to add a new product from the drop down list. See Adding a New Product.
- Vendor: After selecting a product, the Vendor field will populate with the Vendors which are currently associated with the product. Select the vendor from the drop-down list. If it is not in the listing, there is also an option to add new vendor from the drop down list. See Adding a New Vendor.
- Cost: After selecting a vendor, the cost field will populate with the cost that was entered when associating a vendor with a product. If no cost was set, then nothing will appear in this field. In this case, enter in cost information.
- Acquisition Date: Enter the date this product was received.
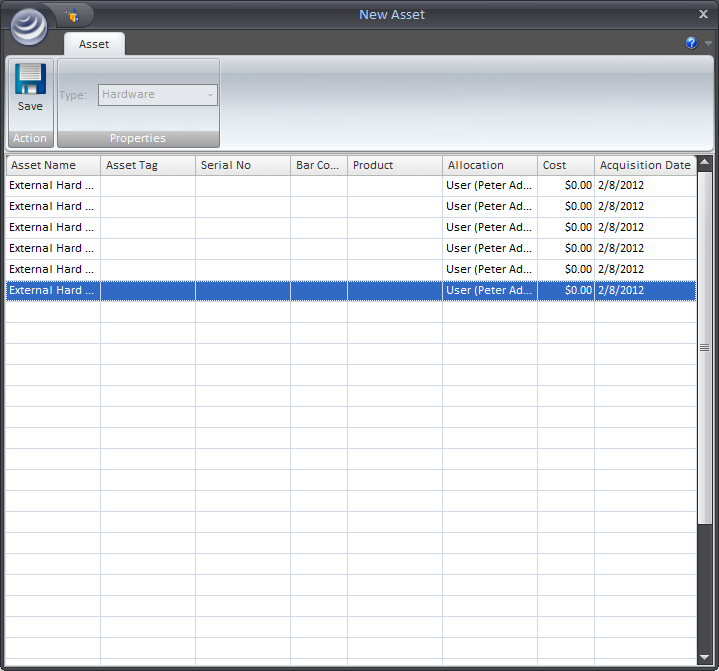
- Quantity: Enter the quantity of assets which you would like to add. This section allows you to add a number of similar assets without having to re-enter all of the information. First, enter as much of the shared information as you can in the New Asset window. Then enter the number of assets you require in the "Quantity" field. When you move focus from that field, you will see a new window appear, as shown below.

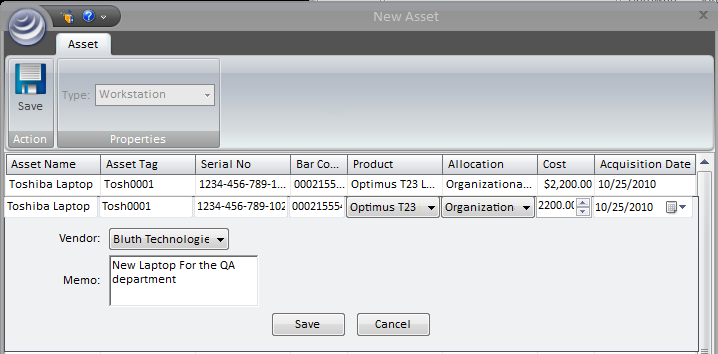
The new window will be populated with a new line item for each asset. You can double-click on each line item to edit the information that needs to be changed (i.e. Serial No., Allocation, etc). A drop-down panel will be displayed to enable you to edit the existing values, as shown below.

When making changes, ensure you click Save in the (drop down panel) for each line item otherwise the changes you made will not be saved when you click off of the line item.
2. Memo:

Enter any additional information which you deem important regarding this asset.
See Also: